
Ok so if you haven’t had the misfortune to hear me rant about pockets, lack of pockets, fake pockets or tiny useless pockets before – you are fortunate, and run. This is your only warning.
Still here? GET READY.
Actually I’m mostly kidding, this is a positive post. Honestly I’m not here to rant about how the patriarchy stole our pockets and we want them back.
But.
If you DO want to hear that particular rant and/or like adorably presented history lessons, this video is absolutely one of my favourite non-cat things on the internet:
Life Hacks by Mum
That’s right folks, today I’m going to show you my all time favourite life hack. 100% of the credit for this goes to my mum who taught me to sew from a very young age and is one of the best problem solvers I know. She seriously missed her calling as an engineer! When she heard one of my many pocket rants she was like…
“Did I teach you nothing daughter?”
So I decided to use the skills she’d already given me to marginally decrease my fabric stash and start adding pockets to my stuff wherever I can. Now, you can too!
Disclaimer
I’m by no means a professional. Other than lessons from mum growing up, I’m self taught. I can’t follow a pattern. I’m open to suggestions for improvement.
My goal in sharing this is to help others be confident enough to give this a whirl and improve their lives by increasing snack carrying capacity.
Instructions
I’ll try break this down and include photos… please tell me if I miss a step!
Step 1: Making a “Pattern”
You can wing/skip this but I find it really helps to make the process faster.
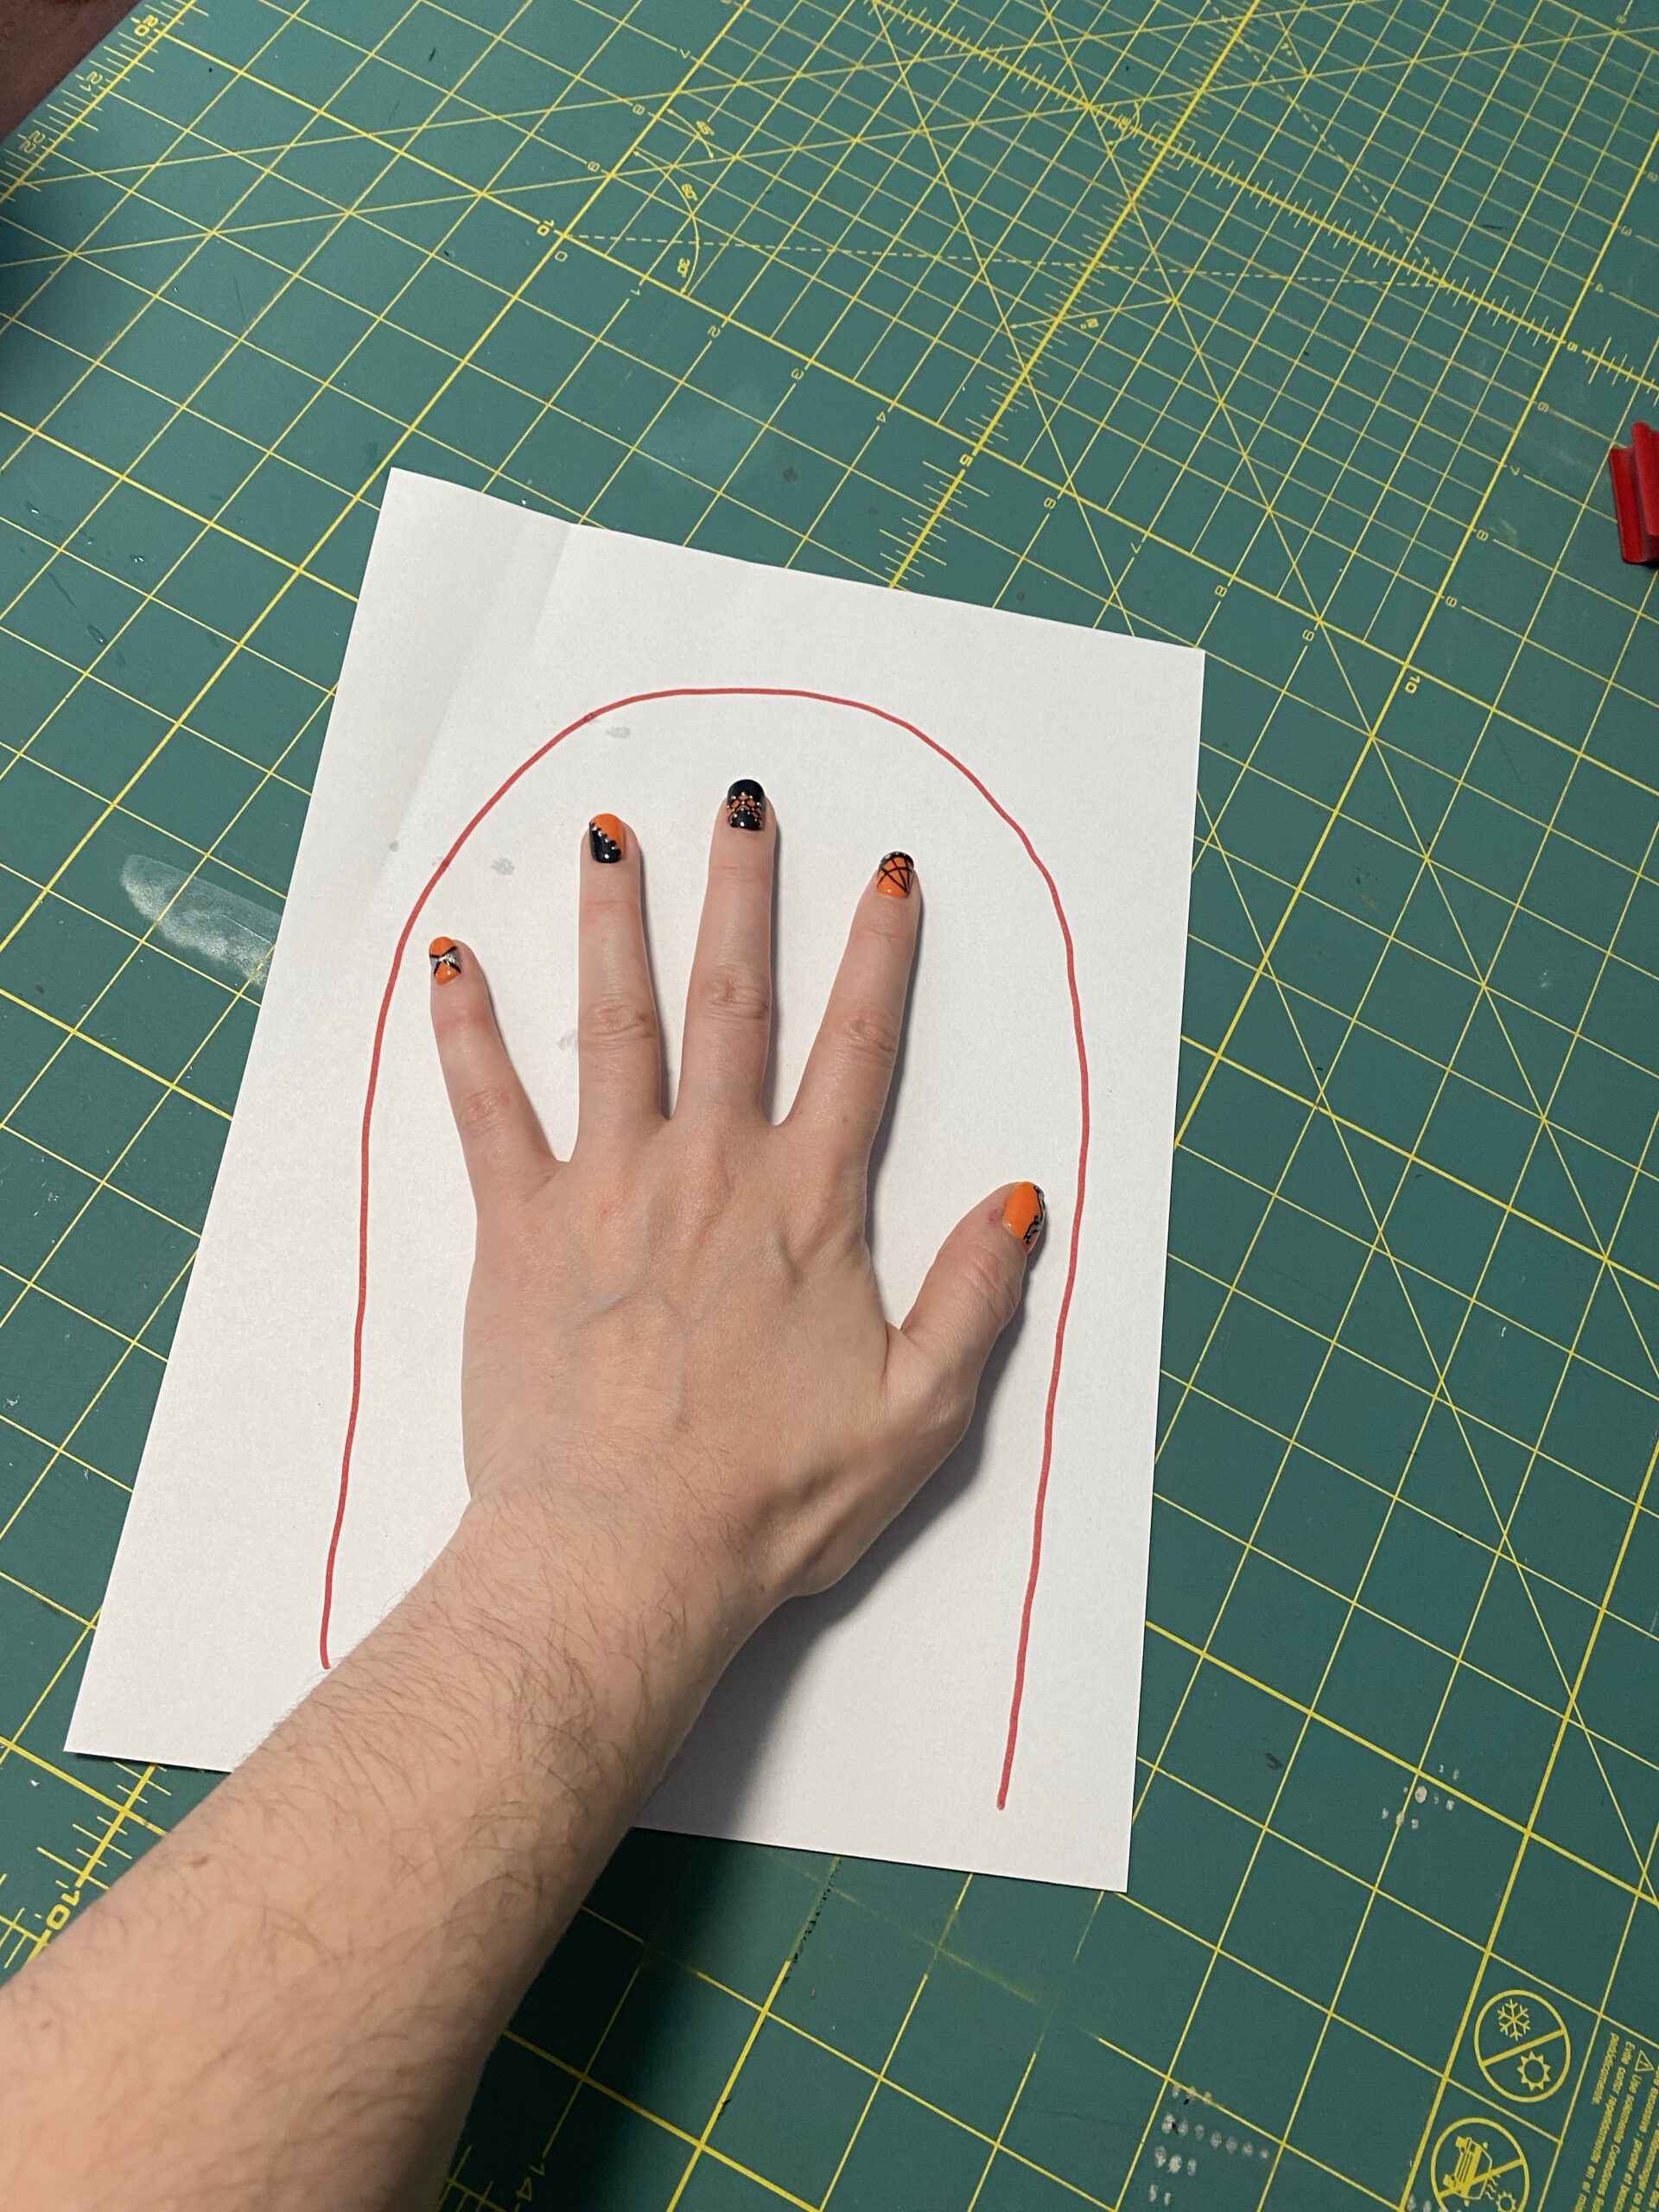
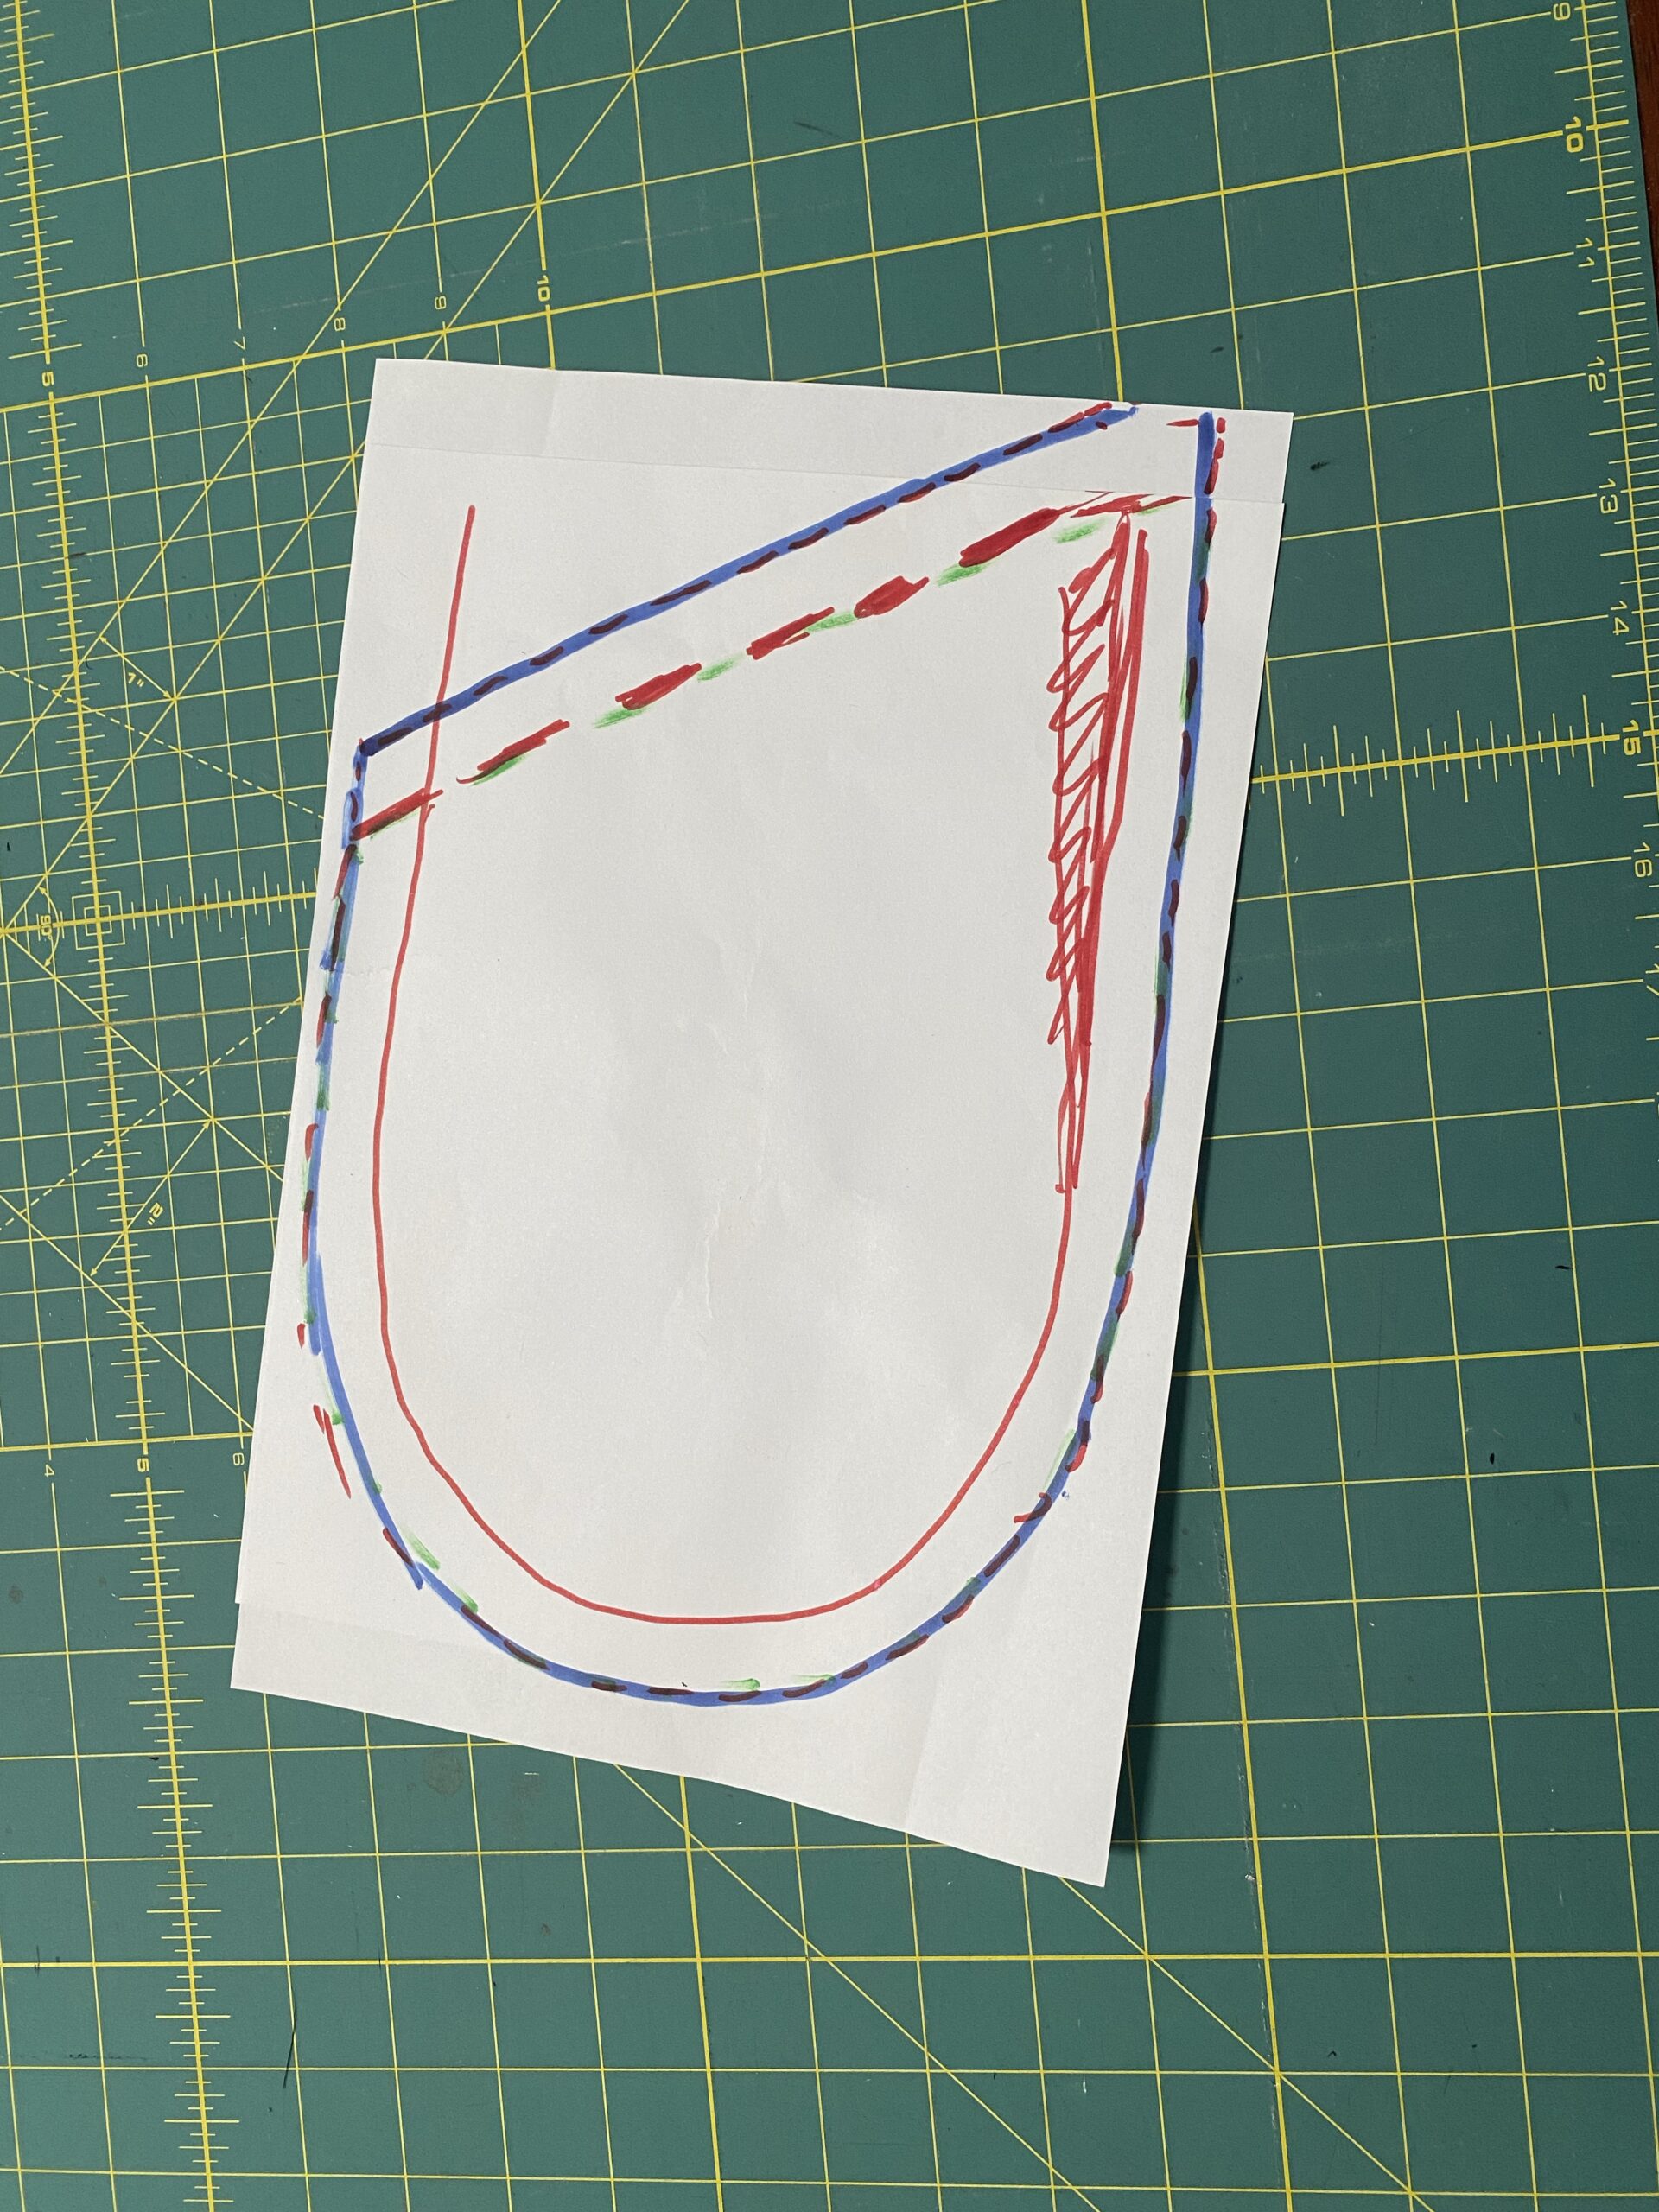
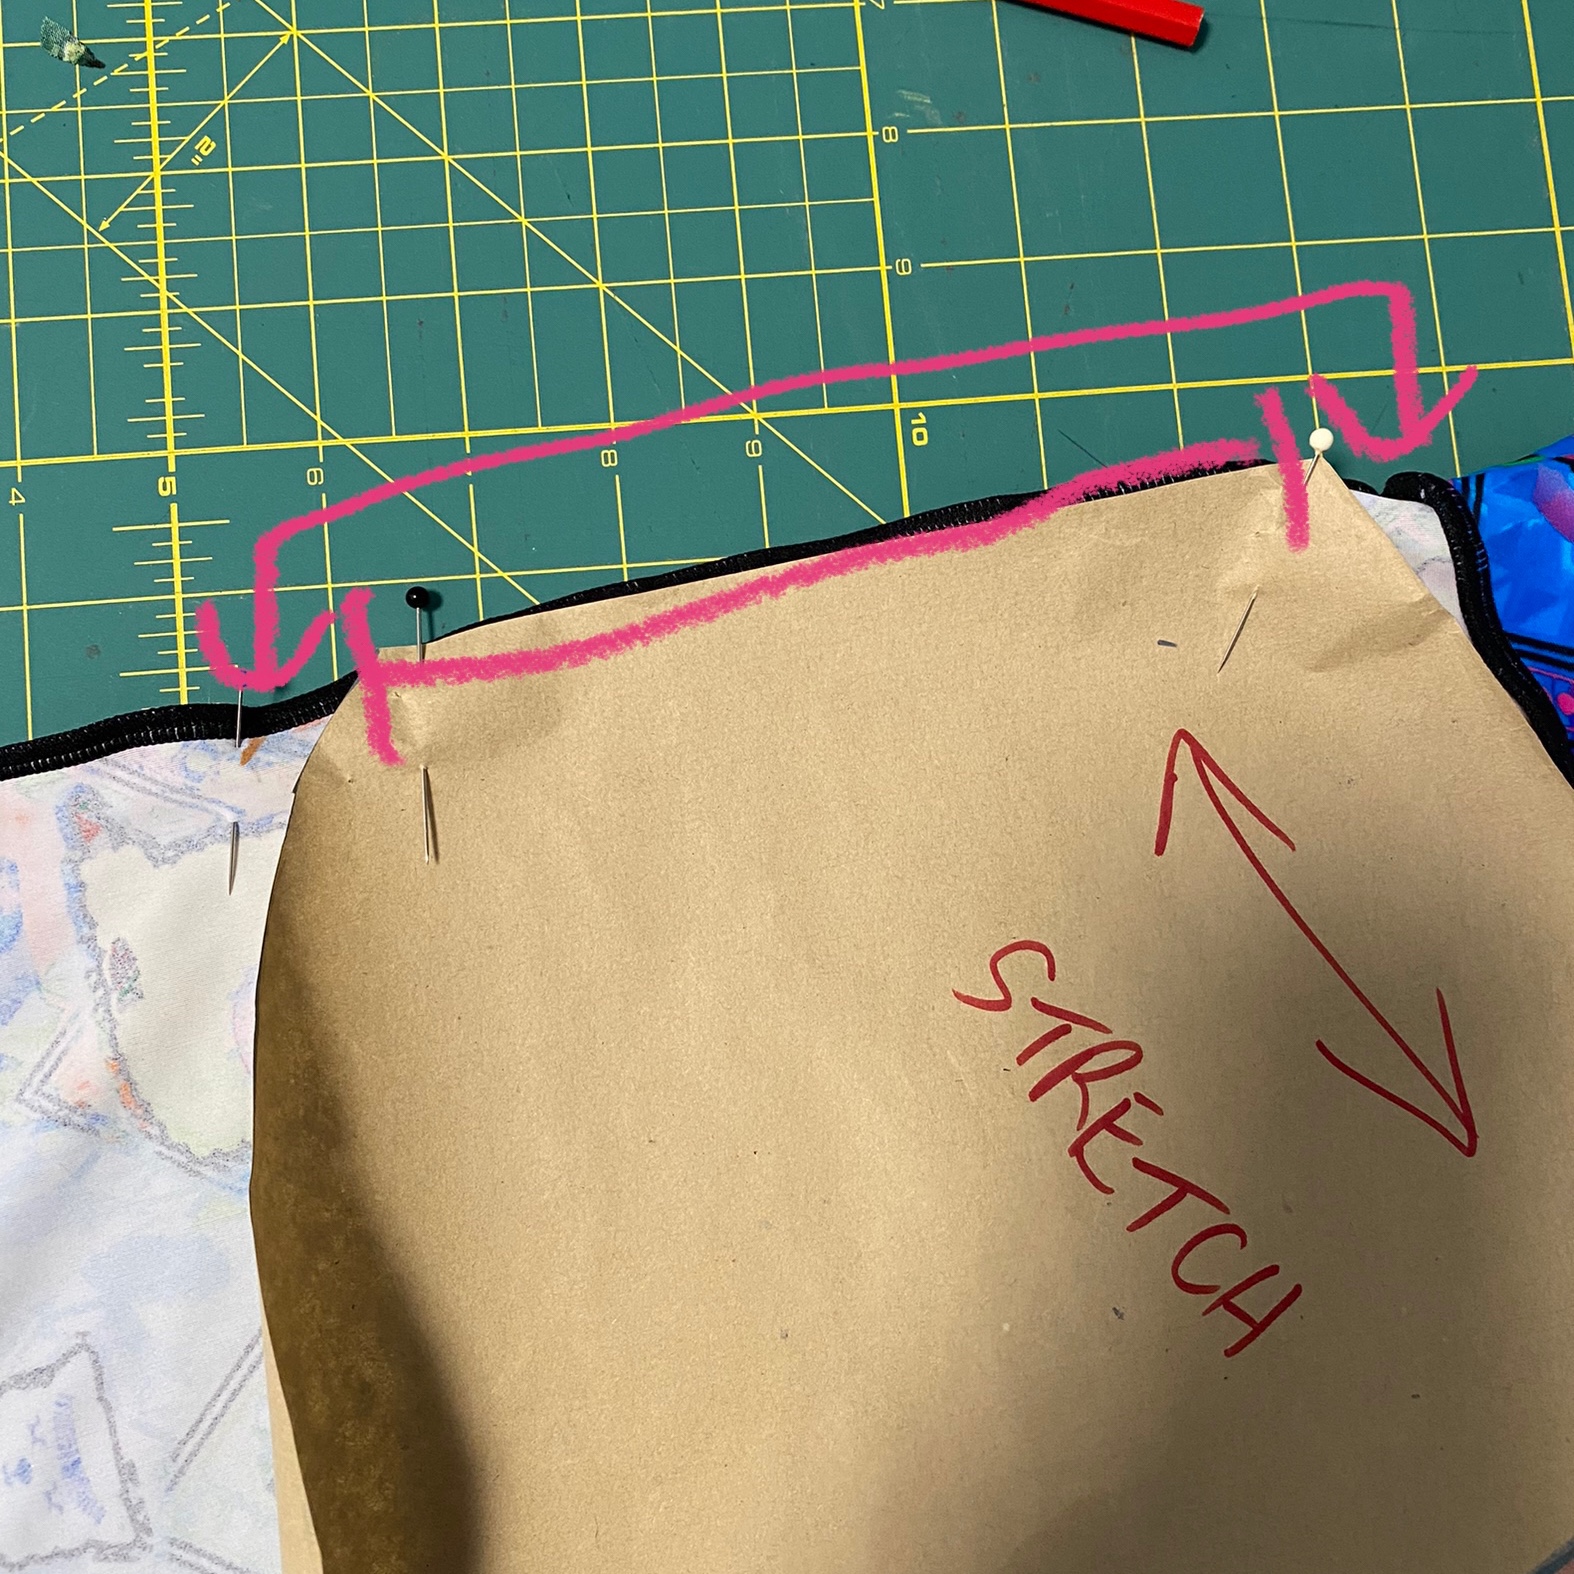
Grab a piece of paper (or butchers paper or wrapping paper – I like to use scrap from printing fails) and make sure it is big enough to fit an outline of your hand. Draw a line around your hand being pretty generous (relax your hand and leave some buffer).
Make sure the line around your wrist area doesn’t get narrower, and if it does – widen that baby out. Here’s mine so far:
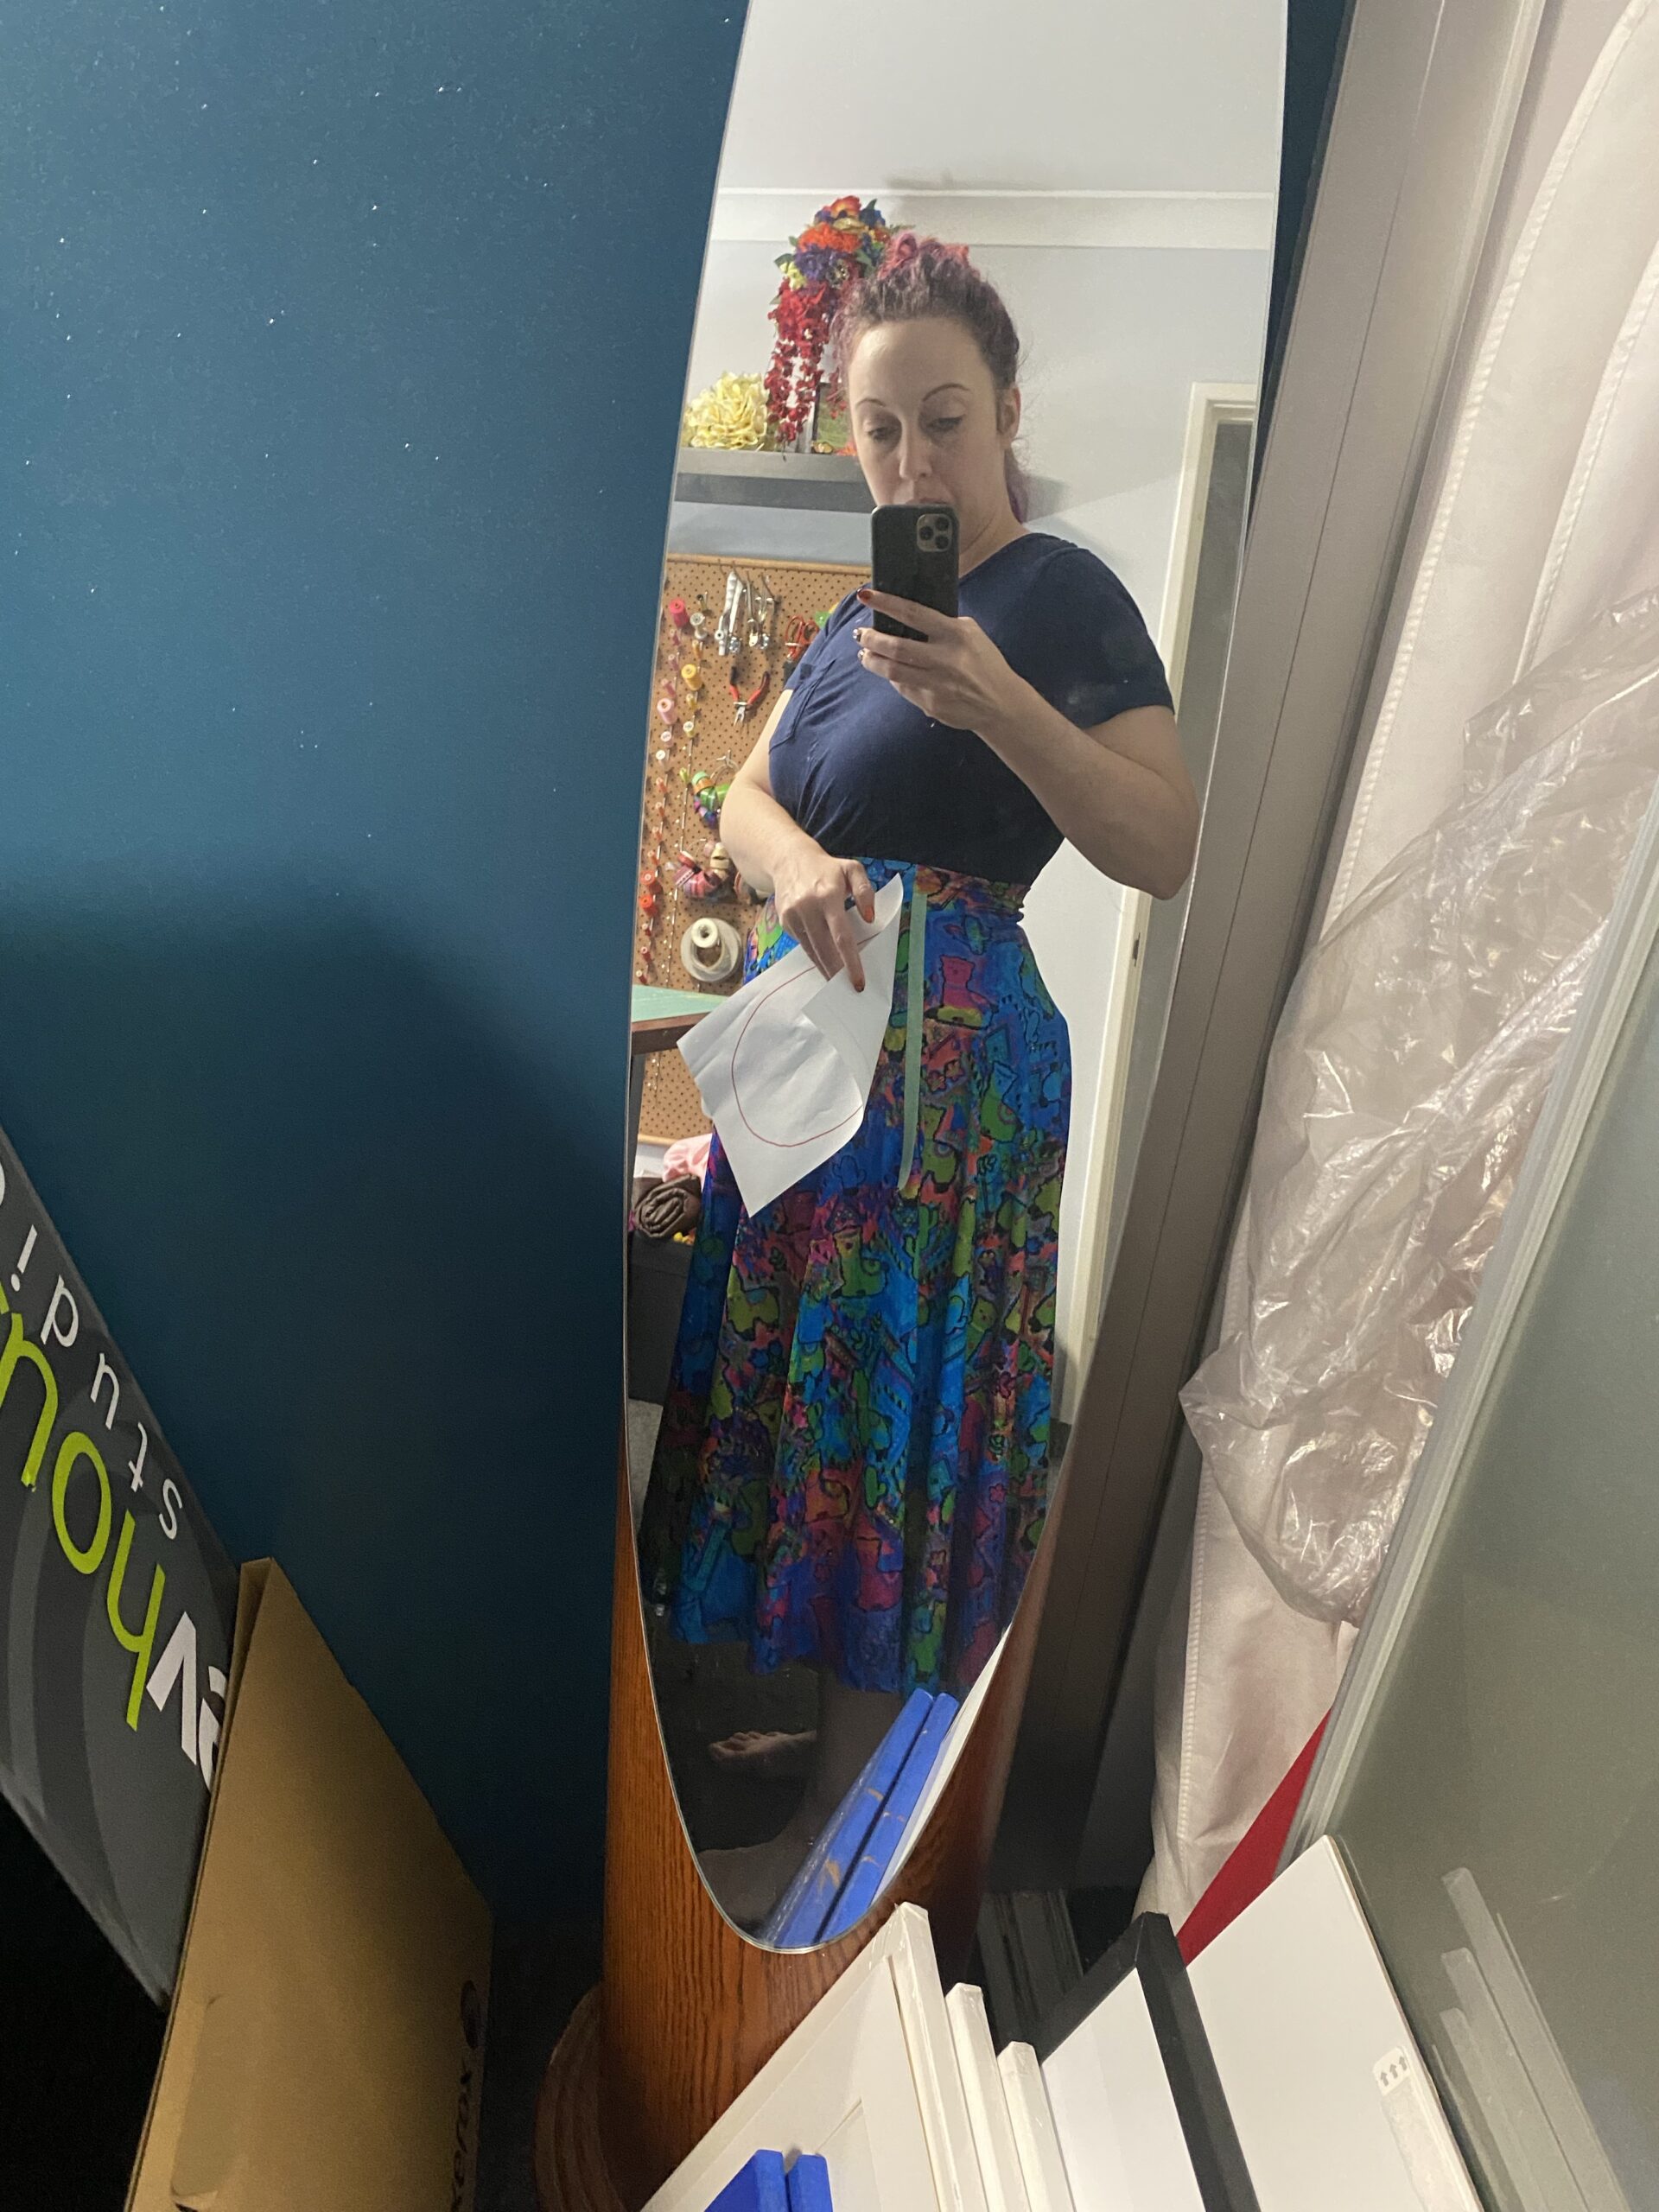
Next we need to work out the angle at the top. Put on whatever garment you’re adding pockets to and hold your pocket pattern up to it to see how it sits. I really like double sided tape for this!
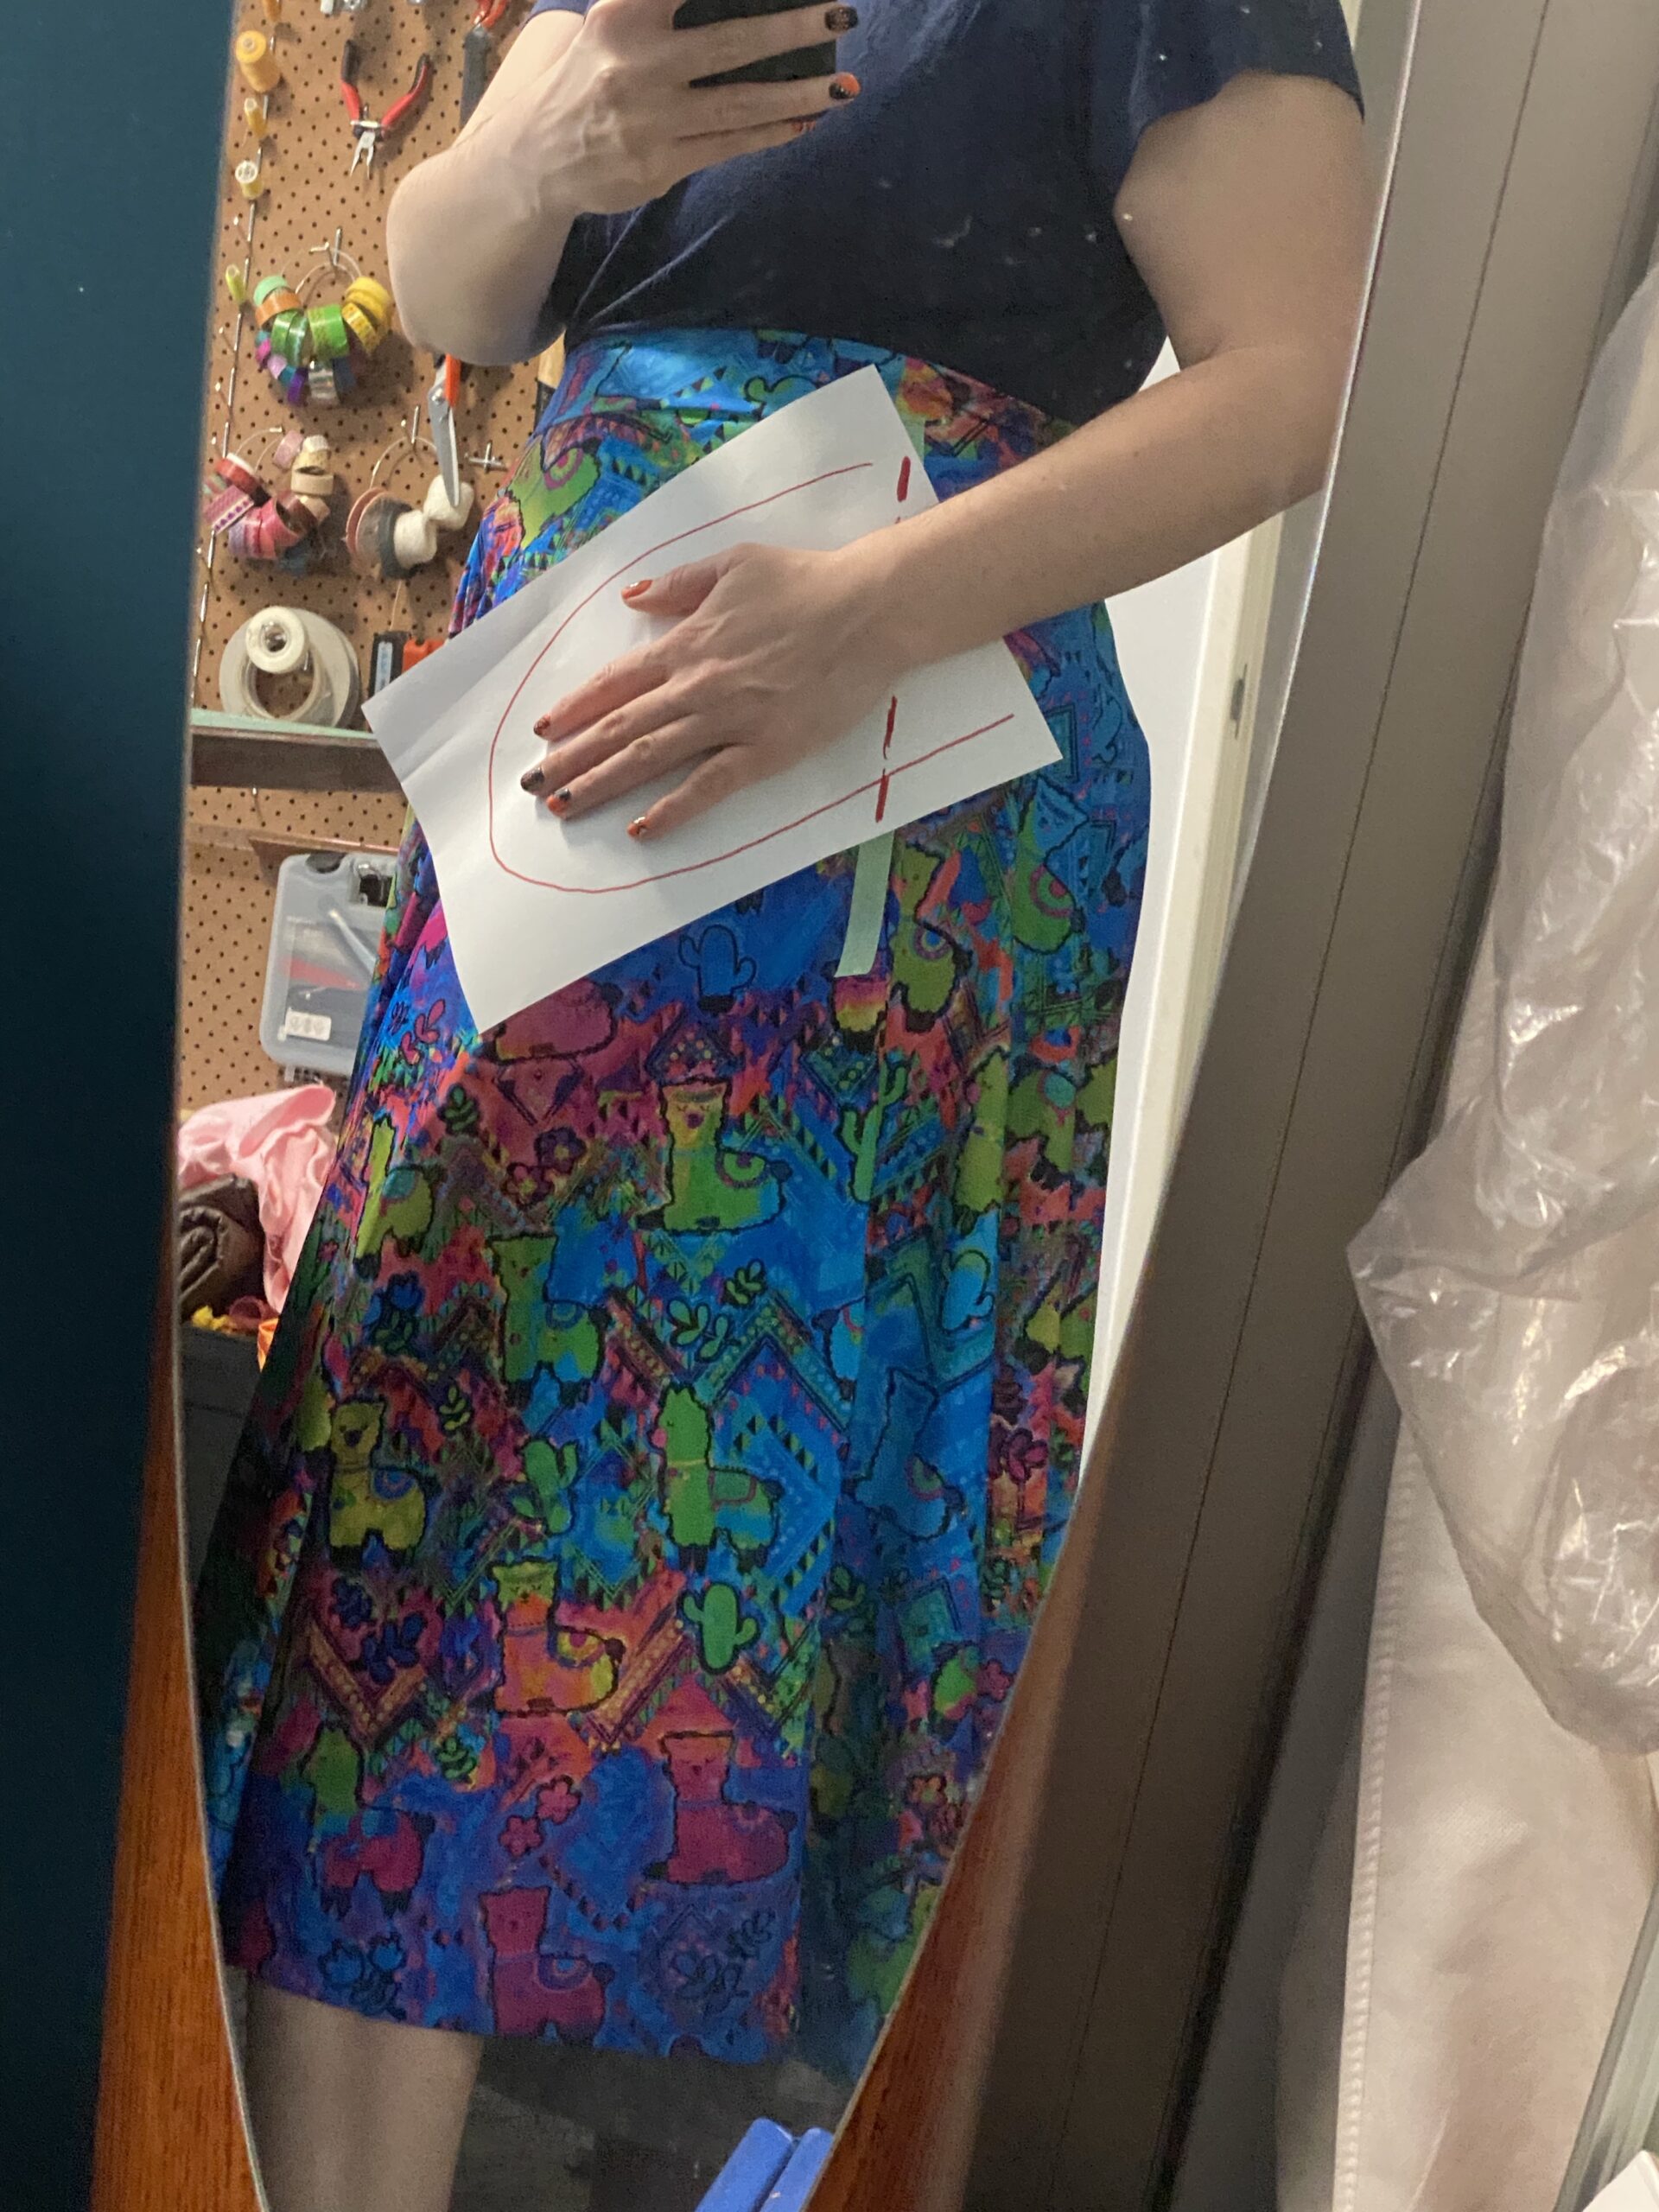
Some tips on placement…
- Avoid going over waistbands and make sure the top of the pocket is lower than the band so you don’t have to do wacky sewing magic
- Angle forward, it feels more natural and will sit better
- Make sure you place it with your wrist on a seam.
Hopefully you can see what I mean here!
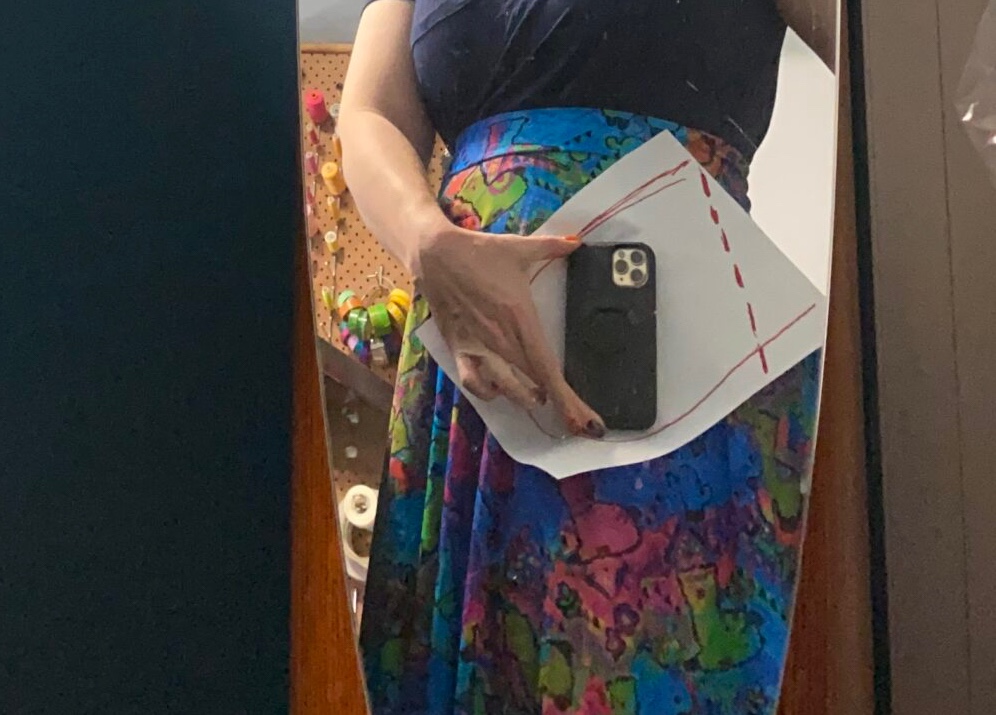
Now grab your phone. Nobody wants pockets that don’t fit their phone. Imagine it is in your pocket (if you have something with big pockets test to see how it sits) and make sure it’s deep enough.
If like me you failed at allowing enough room on your paper, pop your original on another piece and fix it up. Add about 2cm around all four sides and cut your pattern out.
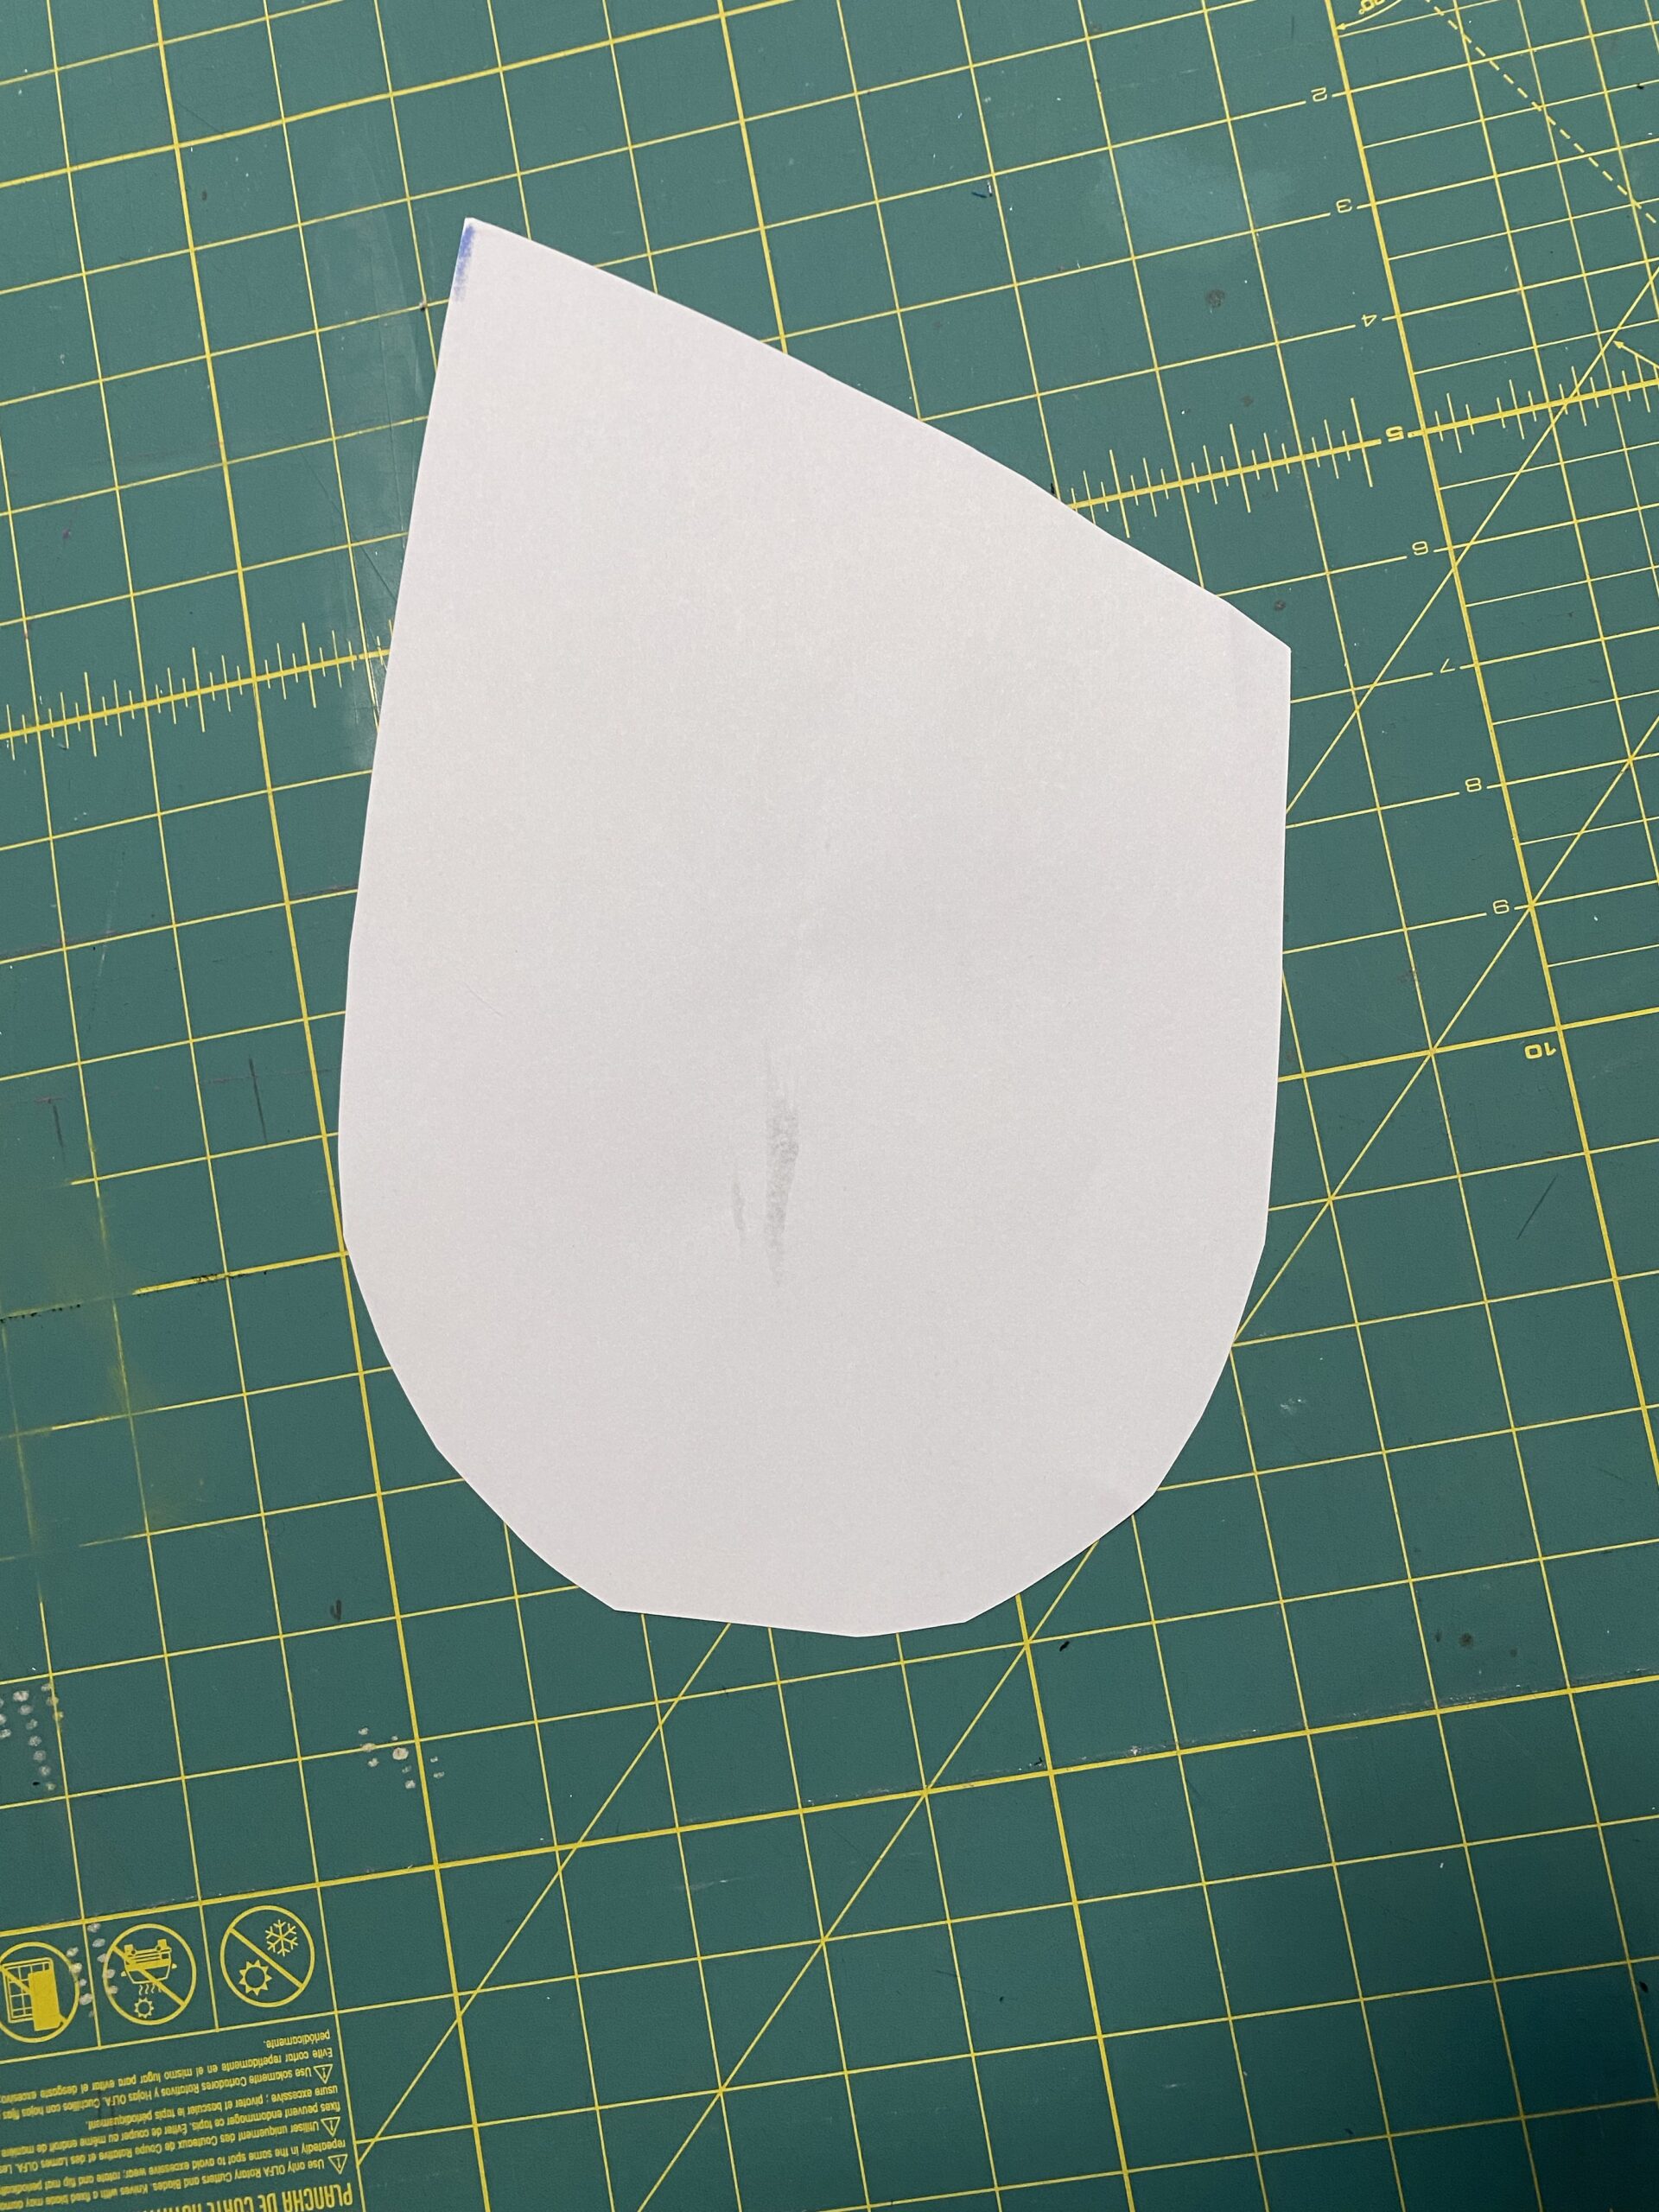
Step 2: Choosing your fabric
This is a bit trial and error. The rule of thumb is that your pocket fabric should never be stretchier than your garment fabric. Usually I avoid stretch fabrics UNLESS (like these pants) the fabric is suuuuuper stretchy. There are some tips I’ll add later for dealing with odd fabrics!
Make sure you have enough fabric to cut 4 pocket patterns. Ideally, you’ll cut 2 “sets” with the fabric folded in half so you don’t end up with weird mismatched halves.
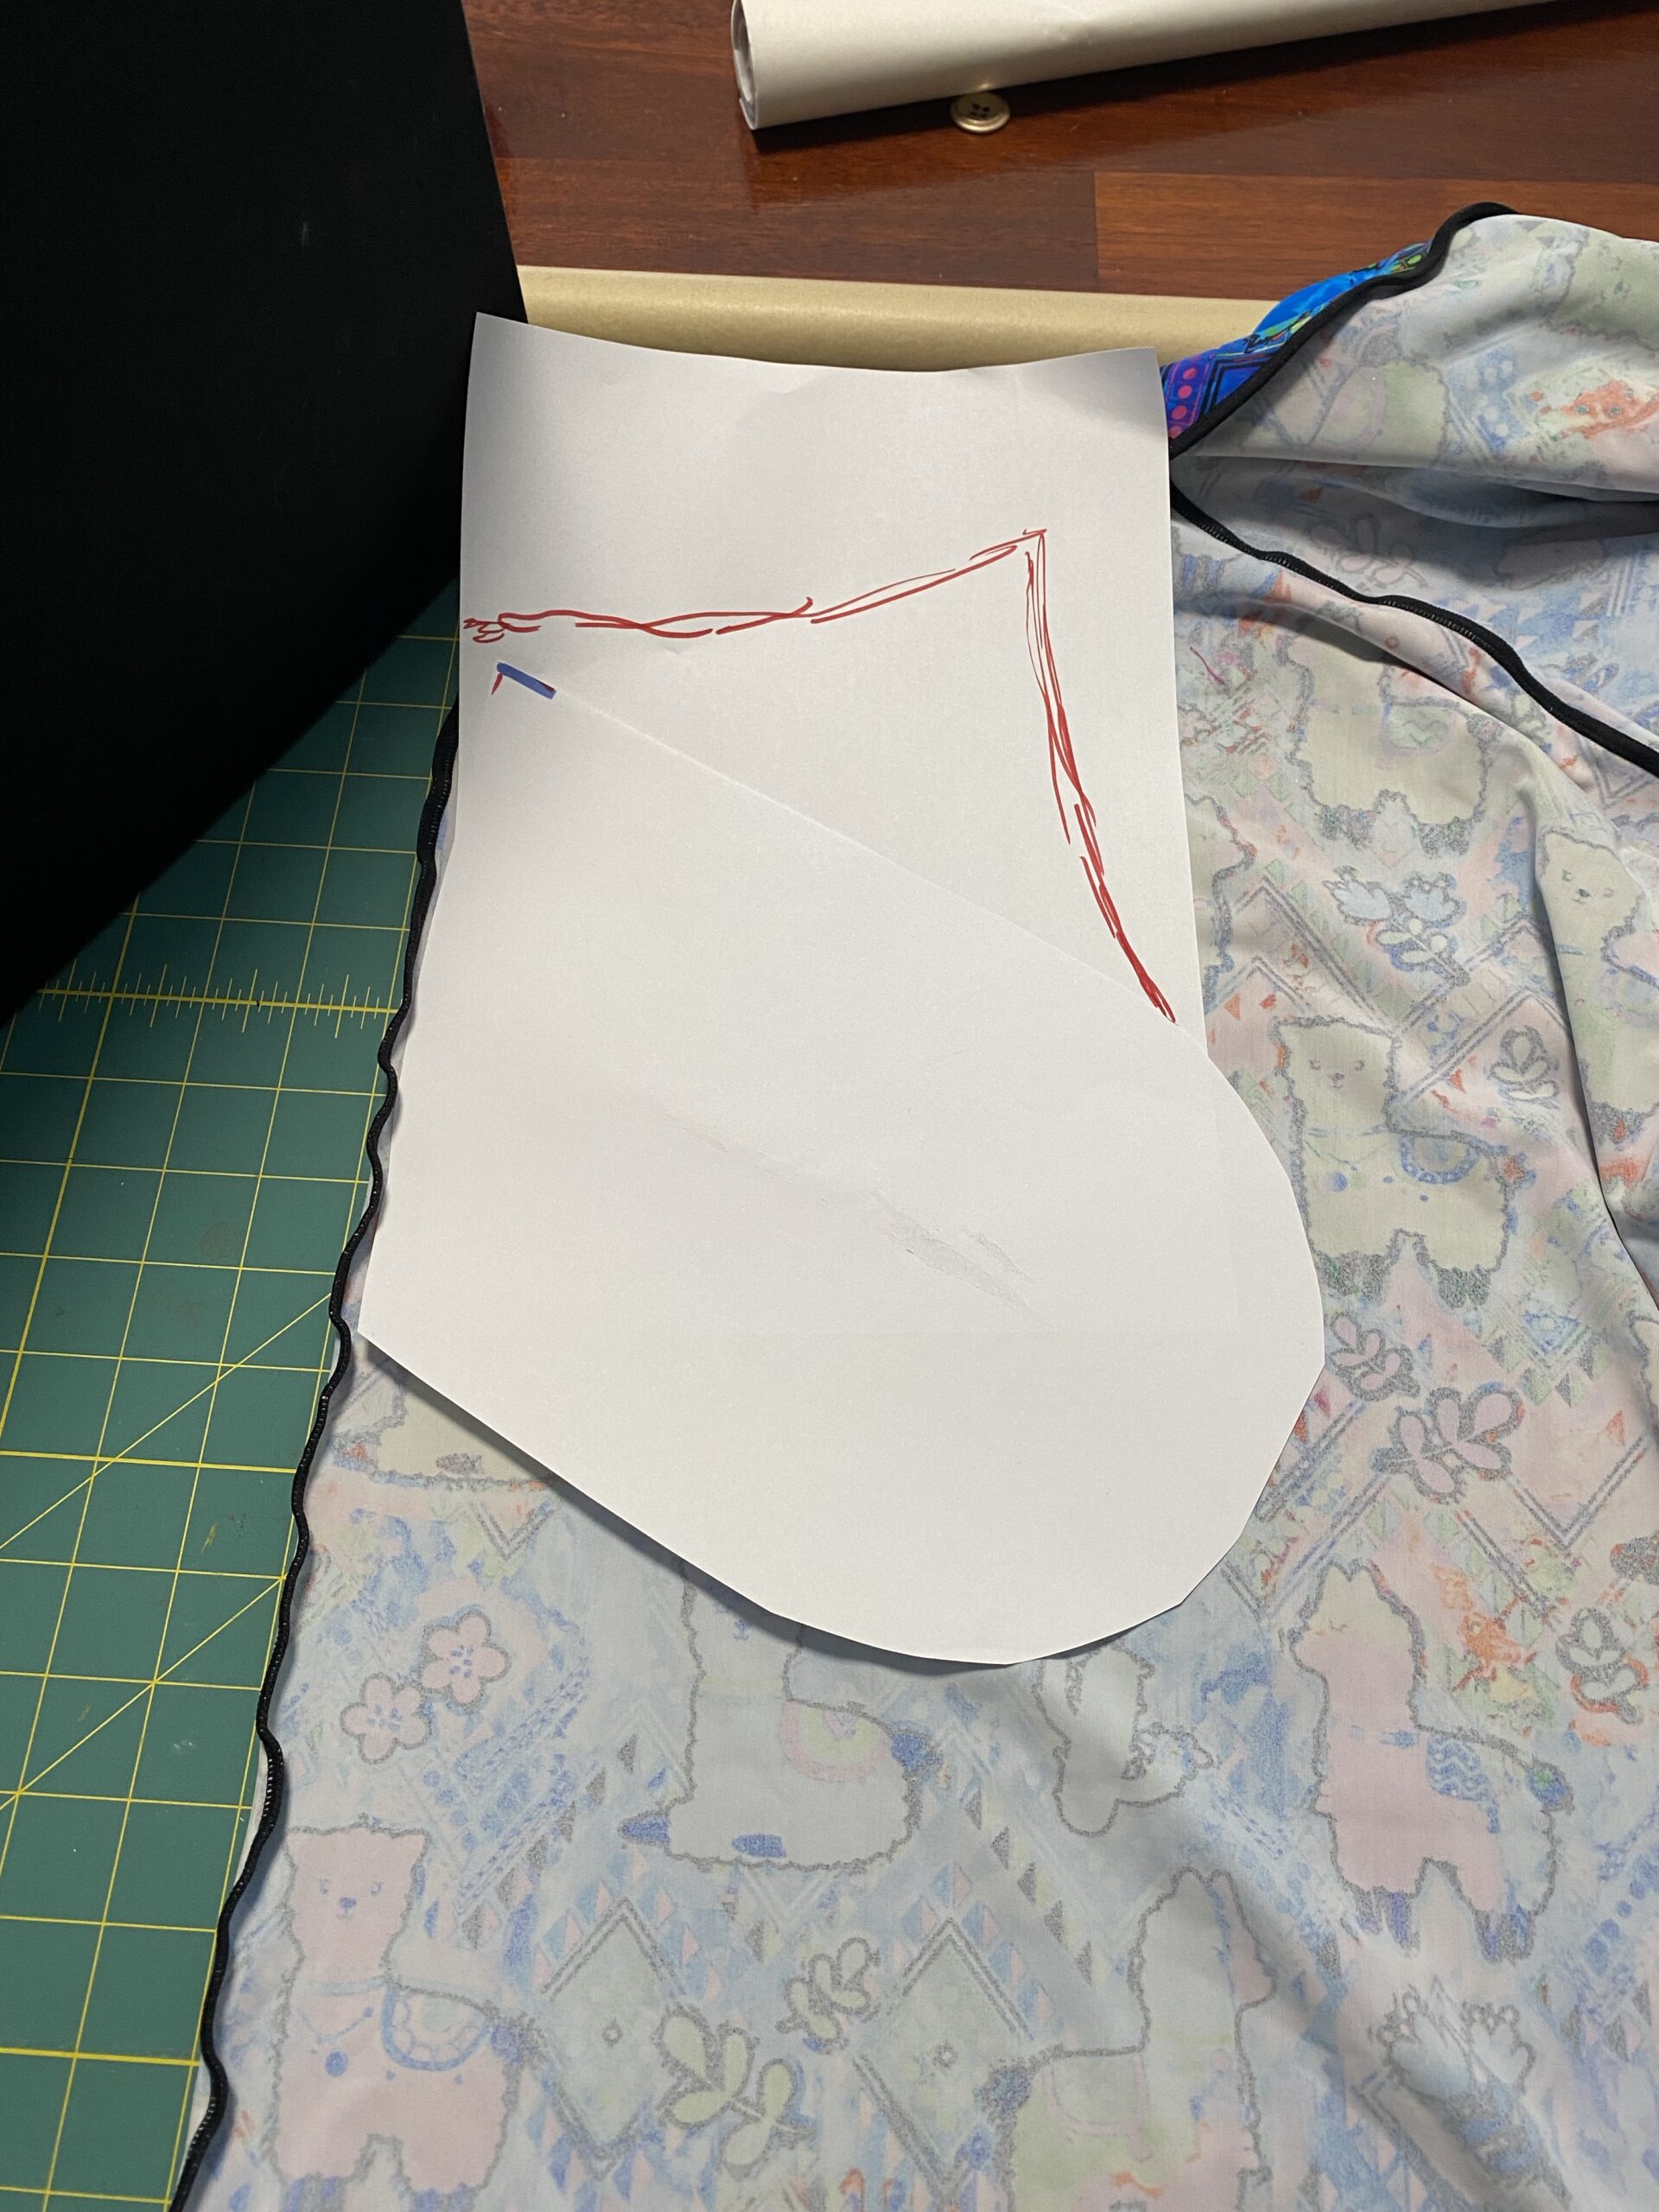
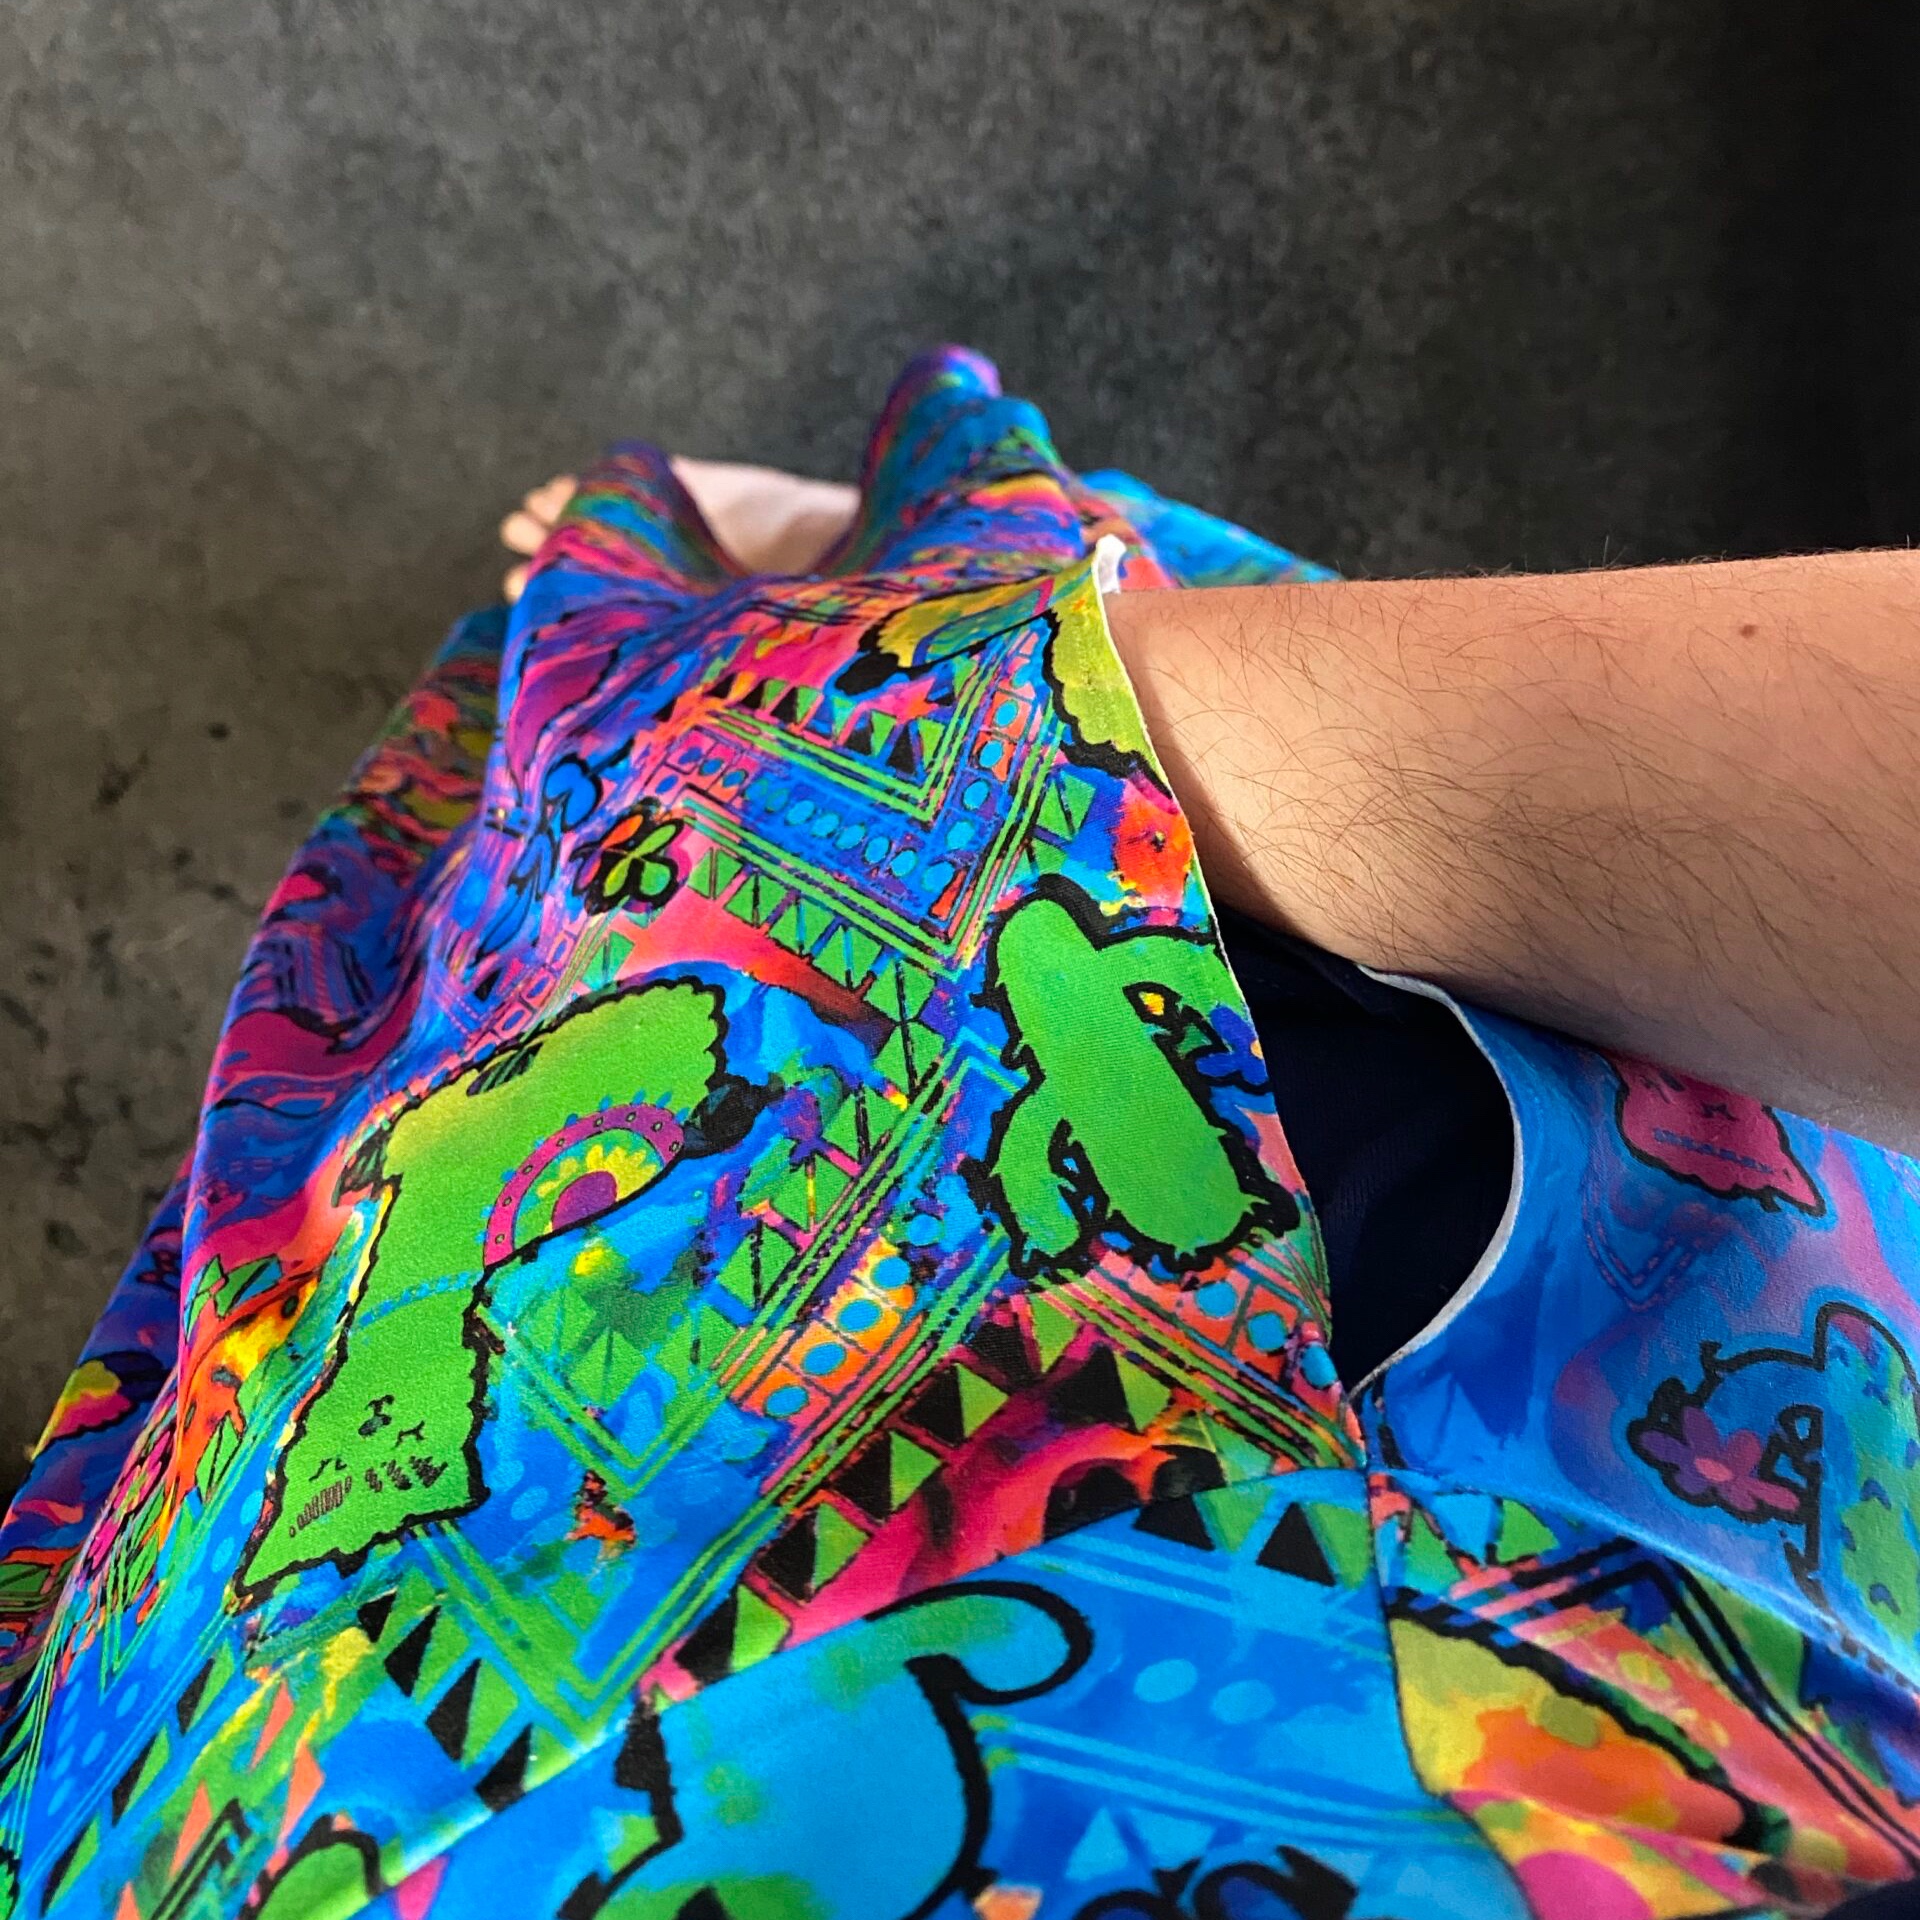
Dealing with stretch or flimsy fabrics
I consulted with Mumsy on these stretchy llama pants about how to best do pockets to avoid future unwanted drooping. Her 2 tips:
- Avoid 2 way stretch in your pocket fabric – and cut with any stretch or give going parallel to waistband (not seam)
- Extend your pattern to meet waistband so you can tack it on to give it more support;
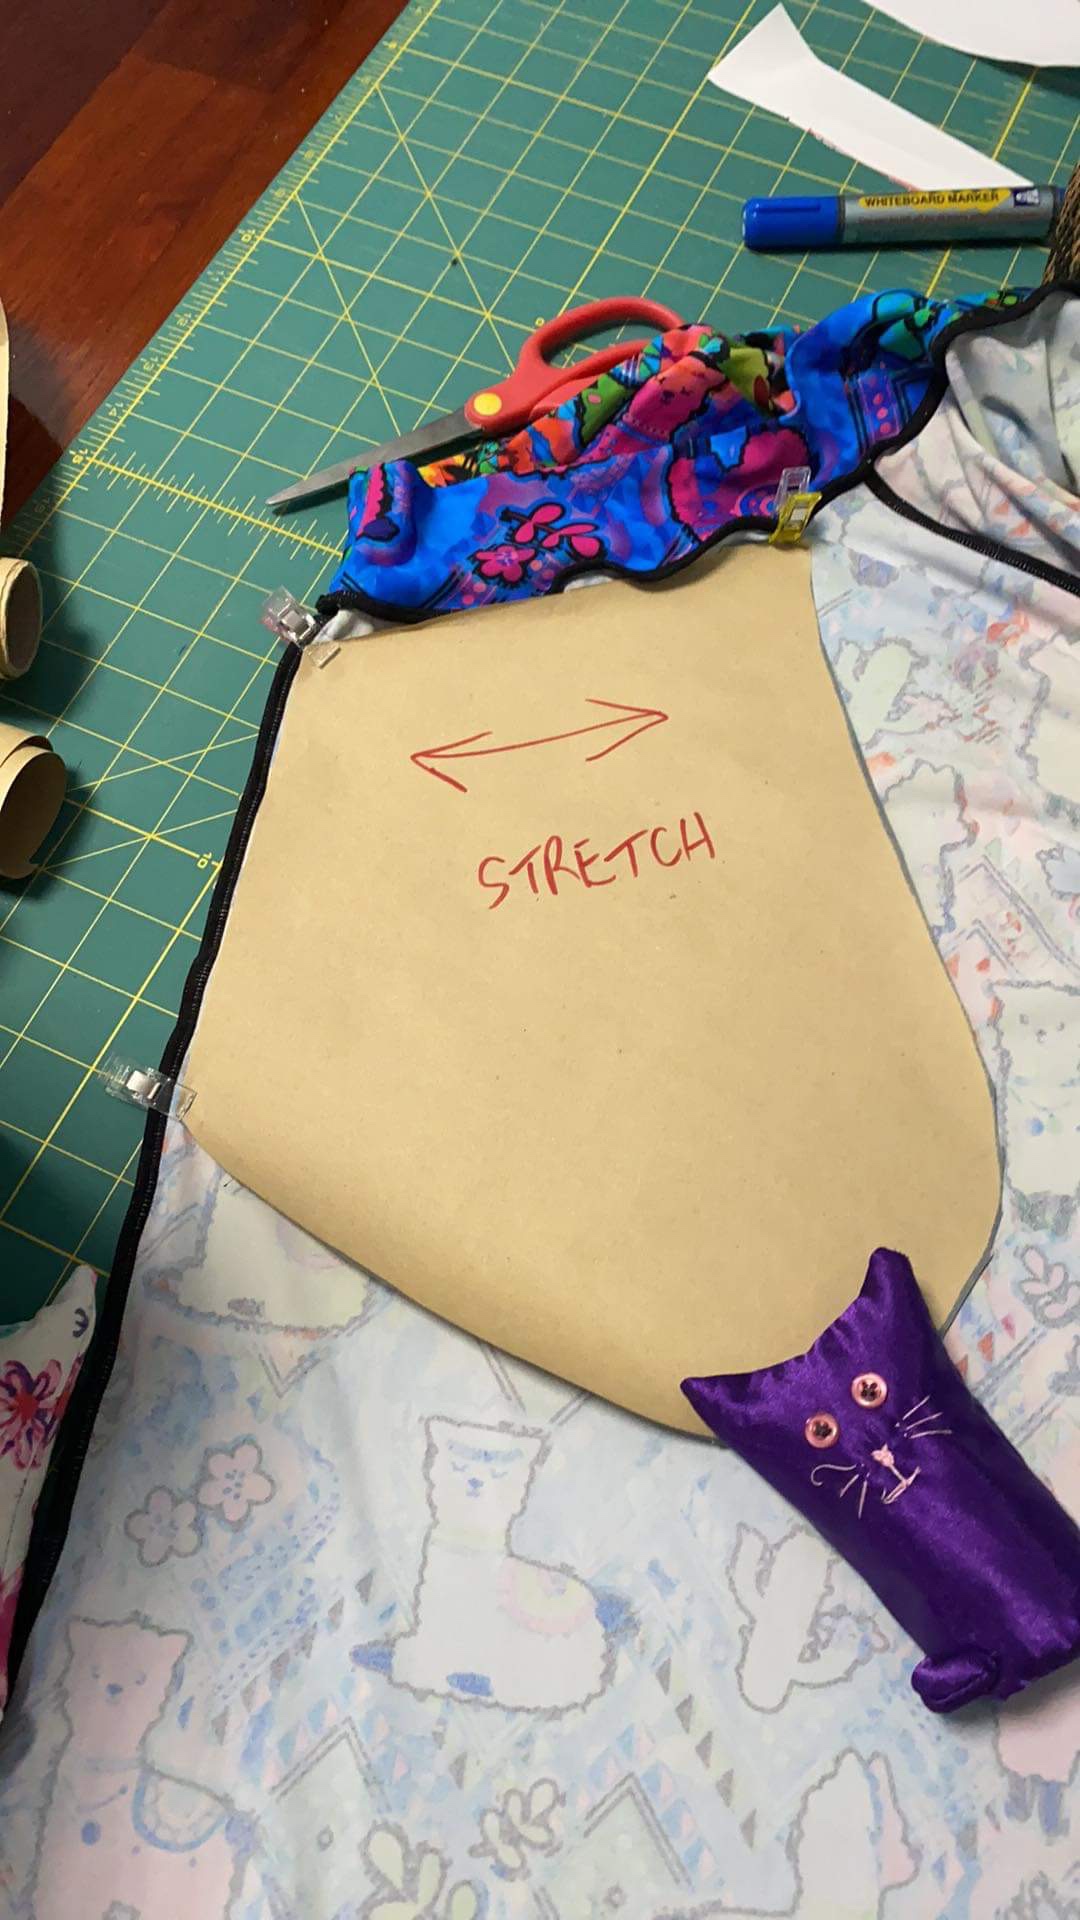
- If you use stretch fabric, use iron on interfacing on the bottom to stop it warping and stretching like crazy.
Here’s what I ended up with for my llama pants:
Step 3: Unpicking your seams
This is by far the scariest part, and I’m going to share the most important things to know BEFORE doing this. First and foremost, you need to know what type of seam you are dealing with.
There are 2 main types of stitching – a *regular* sewing stitch (usually either straight or zigzag) or an overlocker stitch. Sometimes, like below, you’ll have both:
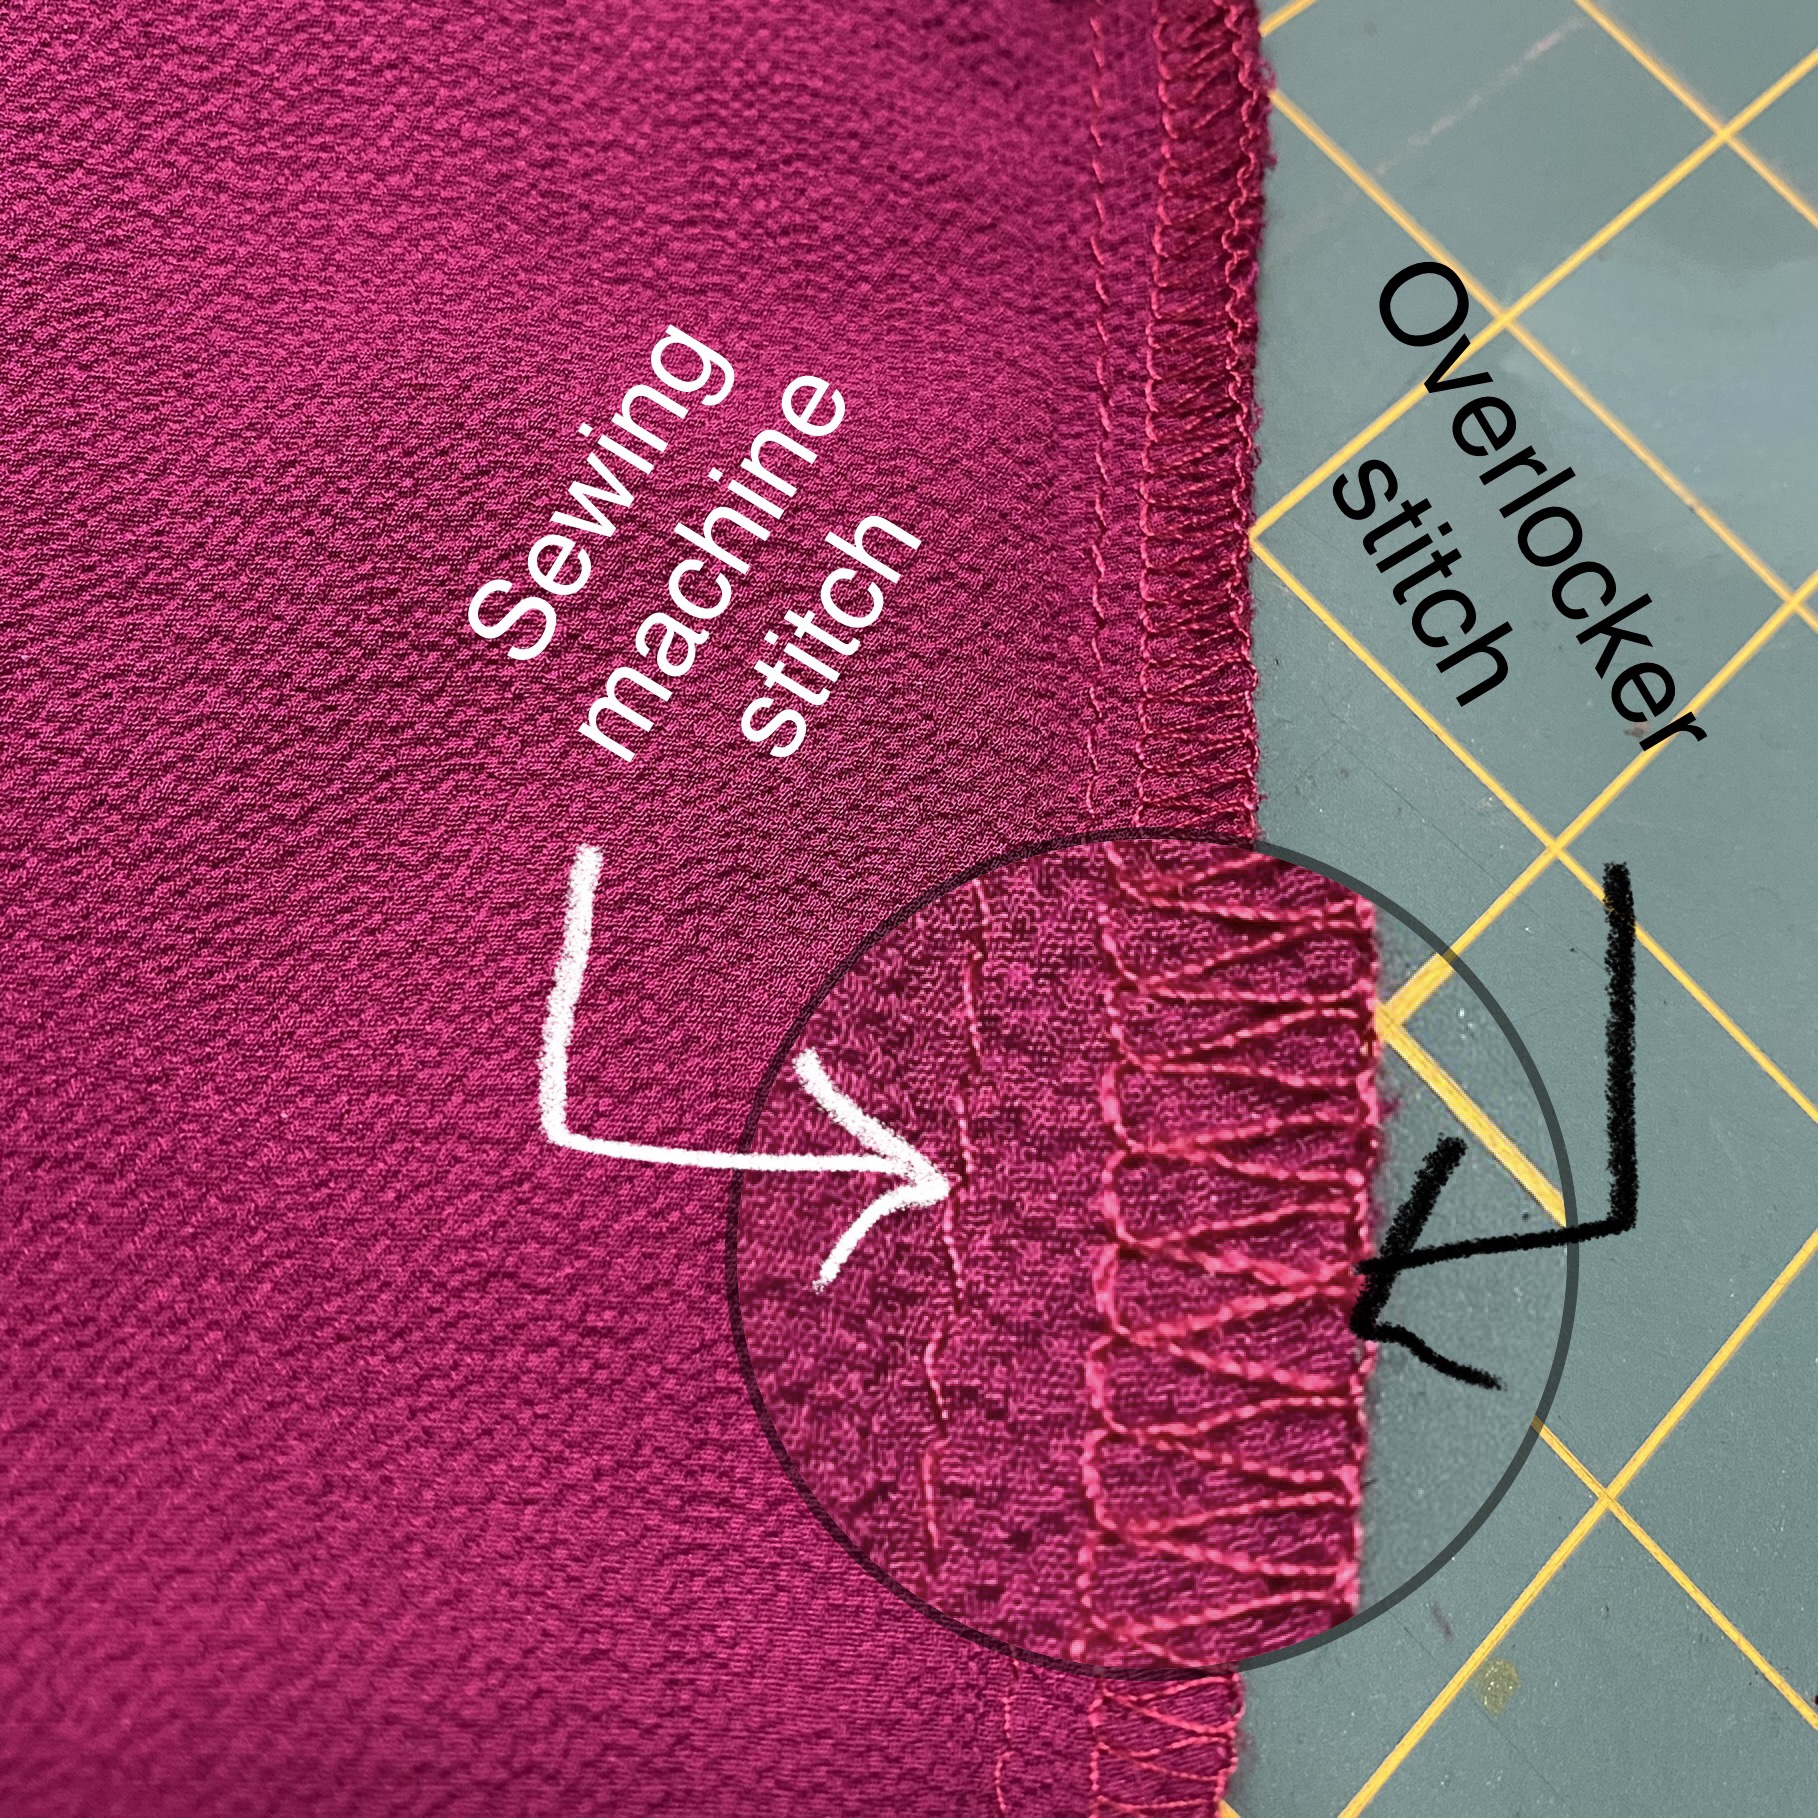
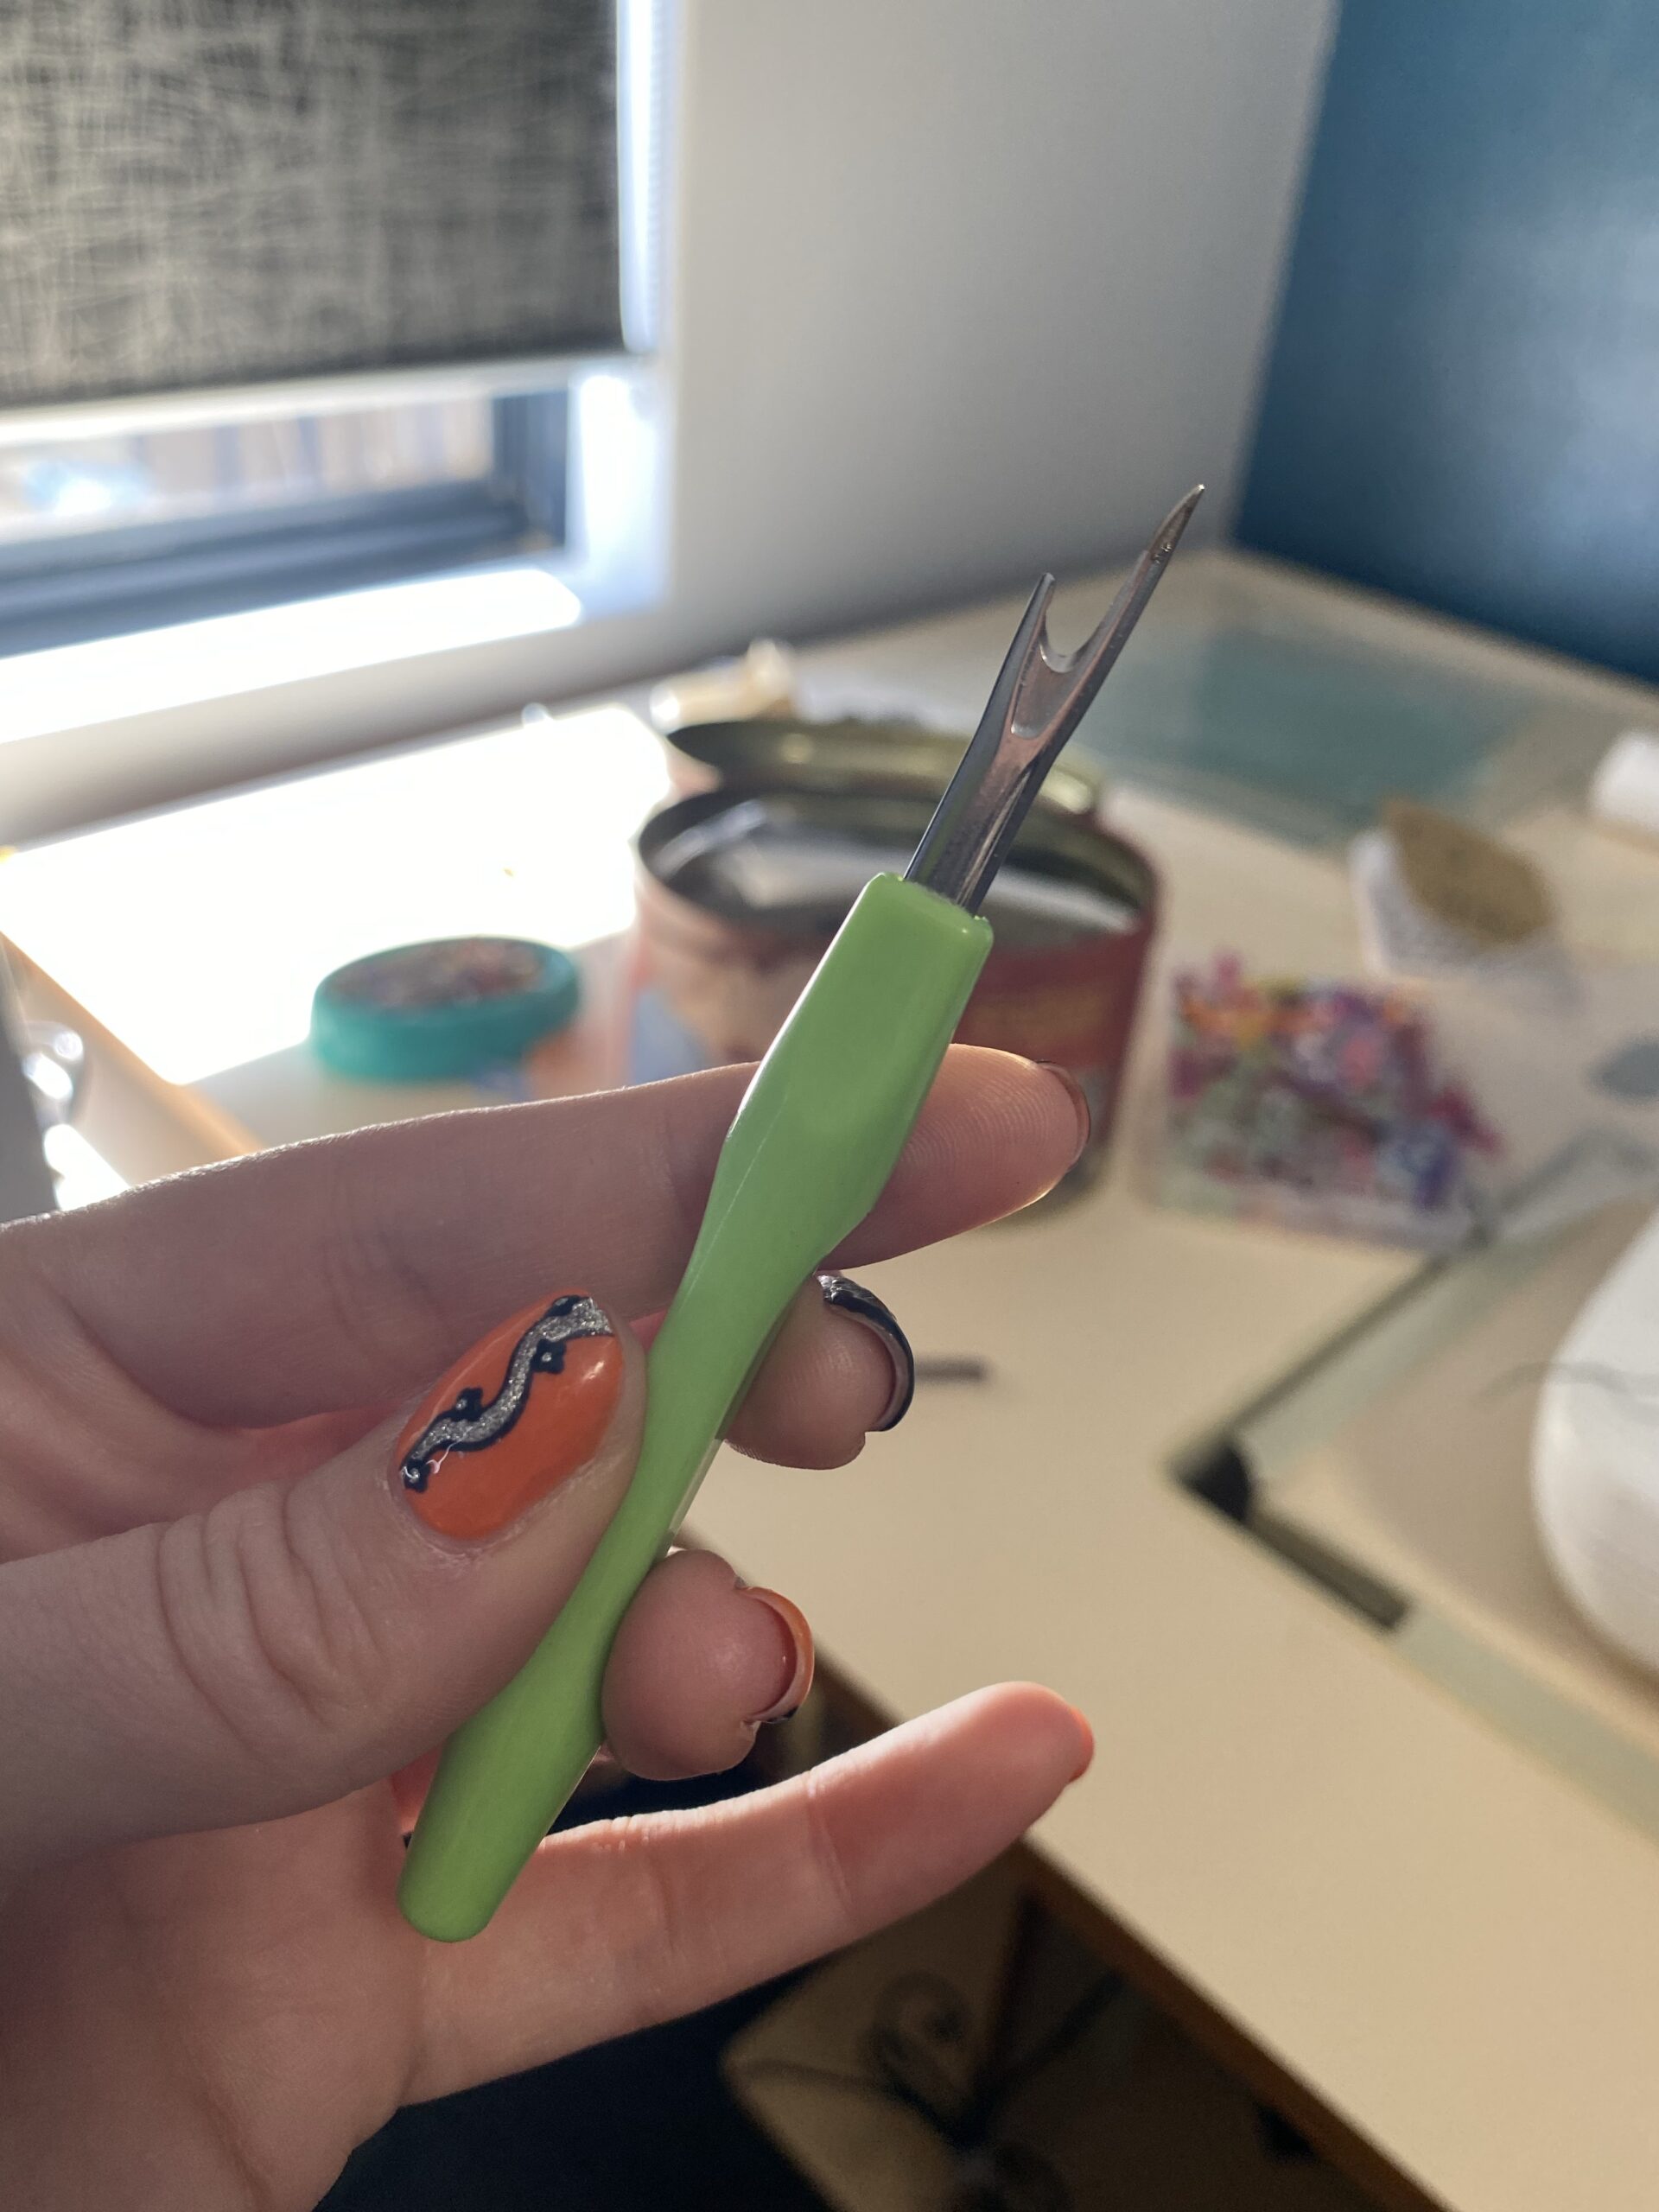
Overlocking uses at least three threads to create a stitch and the best thing about it is that it basically creates a knot for each stitch. The benefit of this is that it won’t unravel past where you unpick it – but it can be a pain to unpick! If you don’t have a quick unpick (sometimes called a seam ripper) you need one.
If your seams are overlocked only, you can just go right ahead and unpick where you plan to attach your pocket plus about 2cm above and below.
If your garment is either machine stitched only or (like the pic above) has both overlocked edges plus a flat stitch, you’ll need to be a touch more careful. If you don’t have a sewing machine and you plan to hand stitch, I would suggest reinforcing over the stitch above and below your pocket opening before unpicking, and also starting from the middle of the pocket so you can tie off the thread.
If you have a machine, it’s probably easiest to just go over the stitch completely later!
Step 4: Chop chop
Cut 4 pocket pattern pieces from your fabric. If your fabric has an obcious front and back, make sure 2 pieces are mirrored – the easiest way to do this is fold your fabric in half and cut 2 at a time. Pin together your “sets” to avoid confusion later – put one to the side for now.
Step 5: Attach your flaps
It’s really important that this bit gets done in the right order.
DO NOT sew your pocket halves together yet!
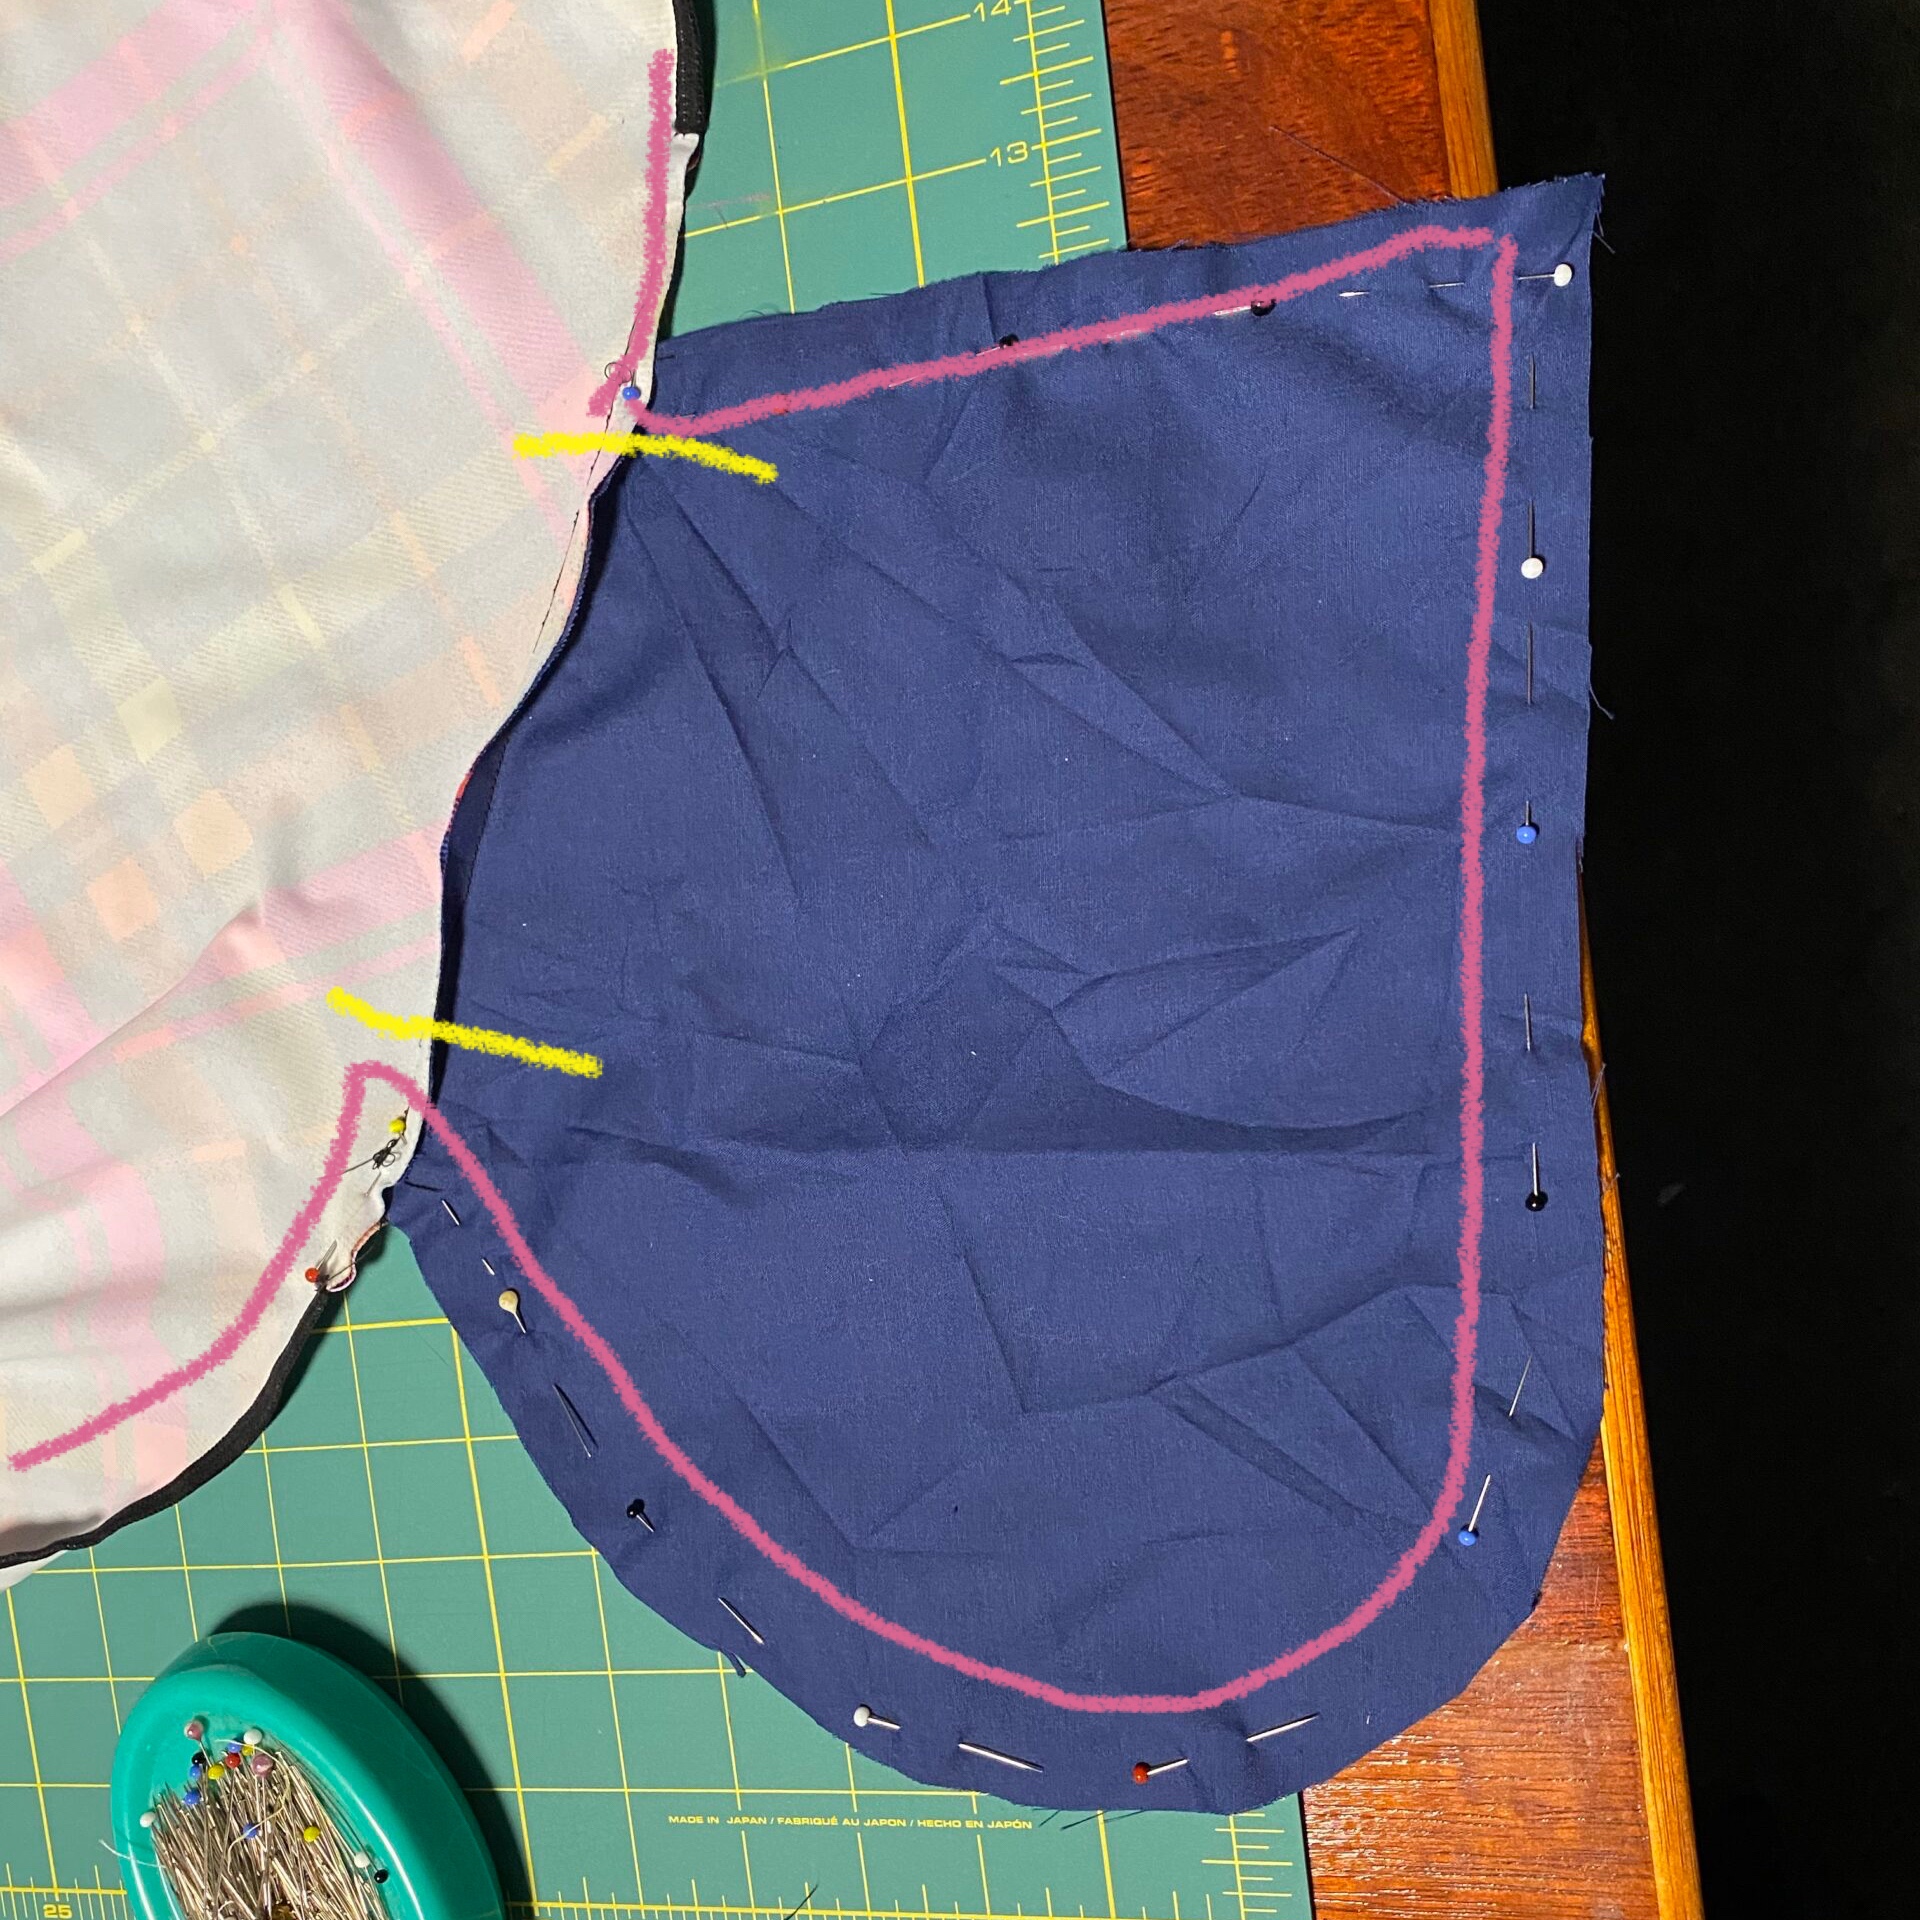
Turn your garment so it is the right way in with front facing up (not inside out) and take one half of one pocket. Align and pin the opening edge right side to right side, making sure to backstitch/secure the stitching at both ends. Try to stitch in line with the inner edge of the seam you just unpicked as this will make it sit better when you’re finished.

Flip your garment over and repeat exactly the same on the back side of the garment and attach the other half of the same pocket.
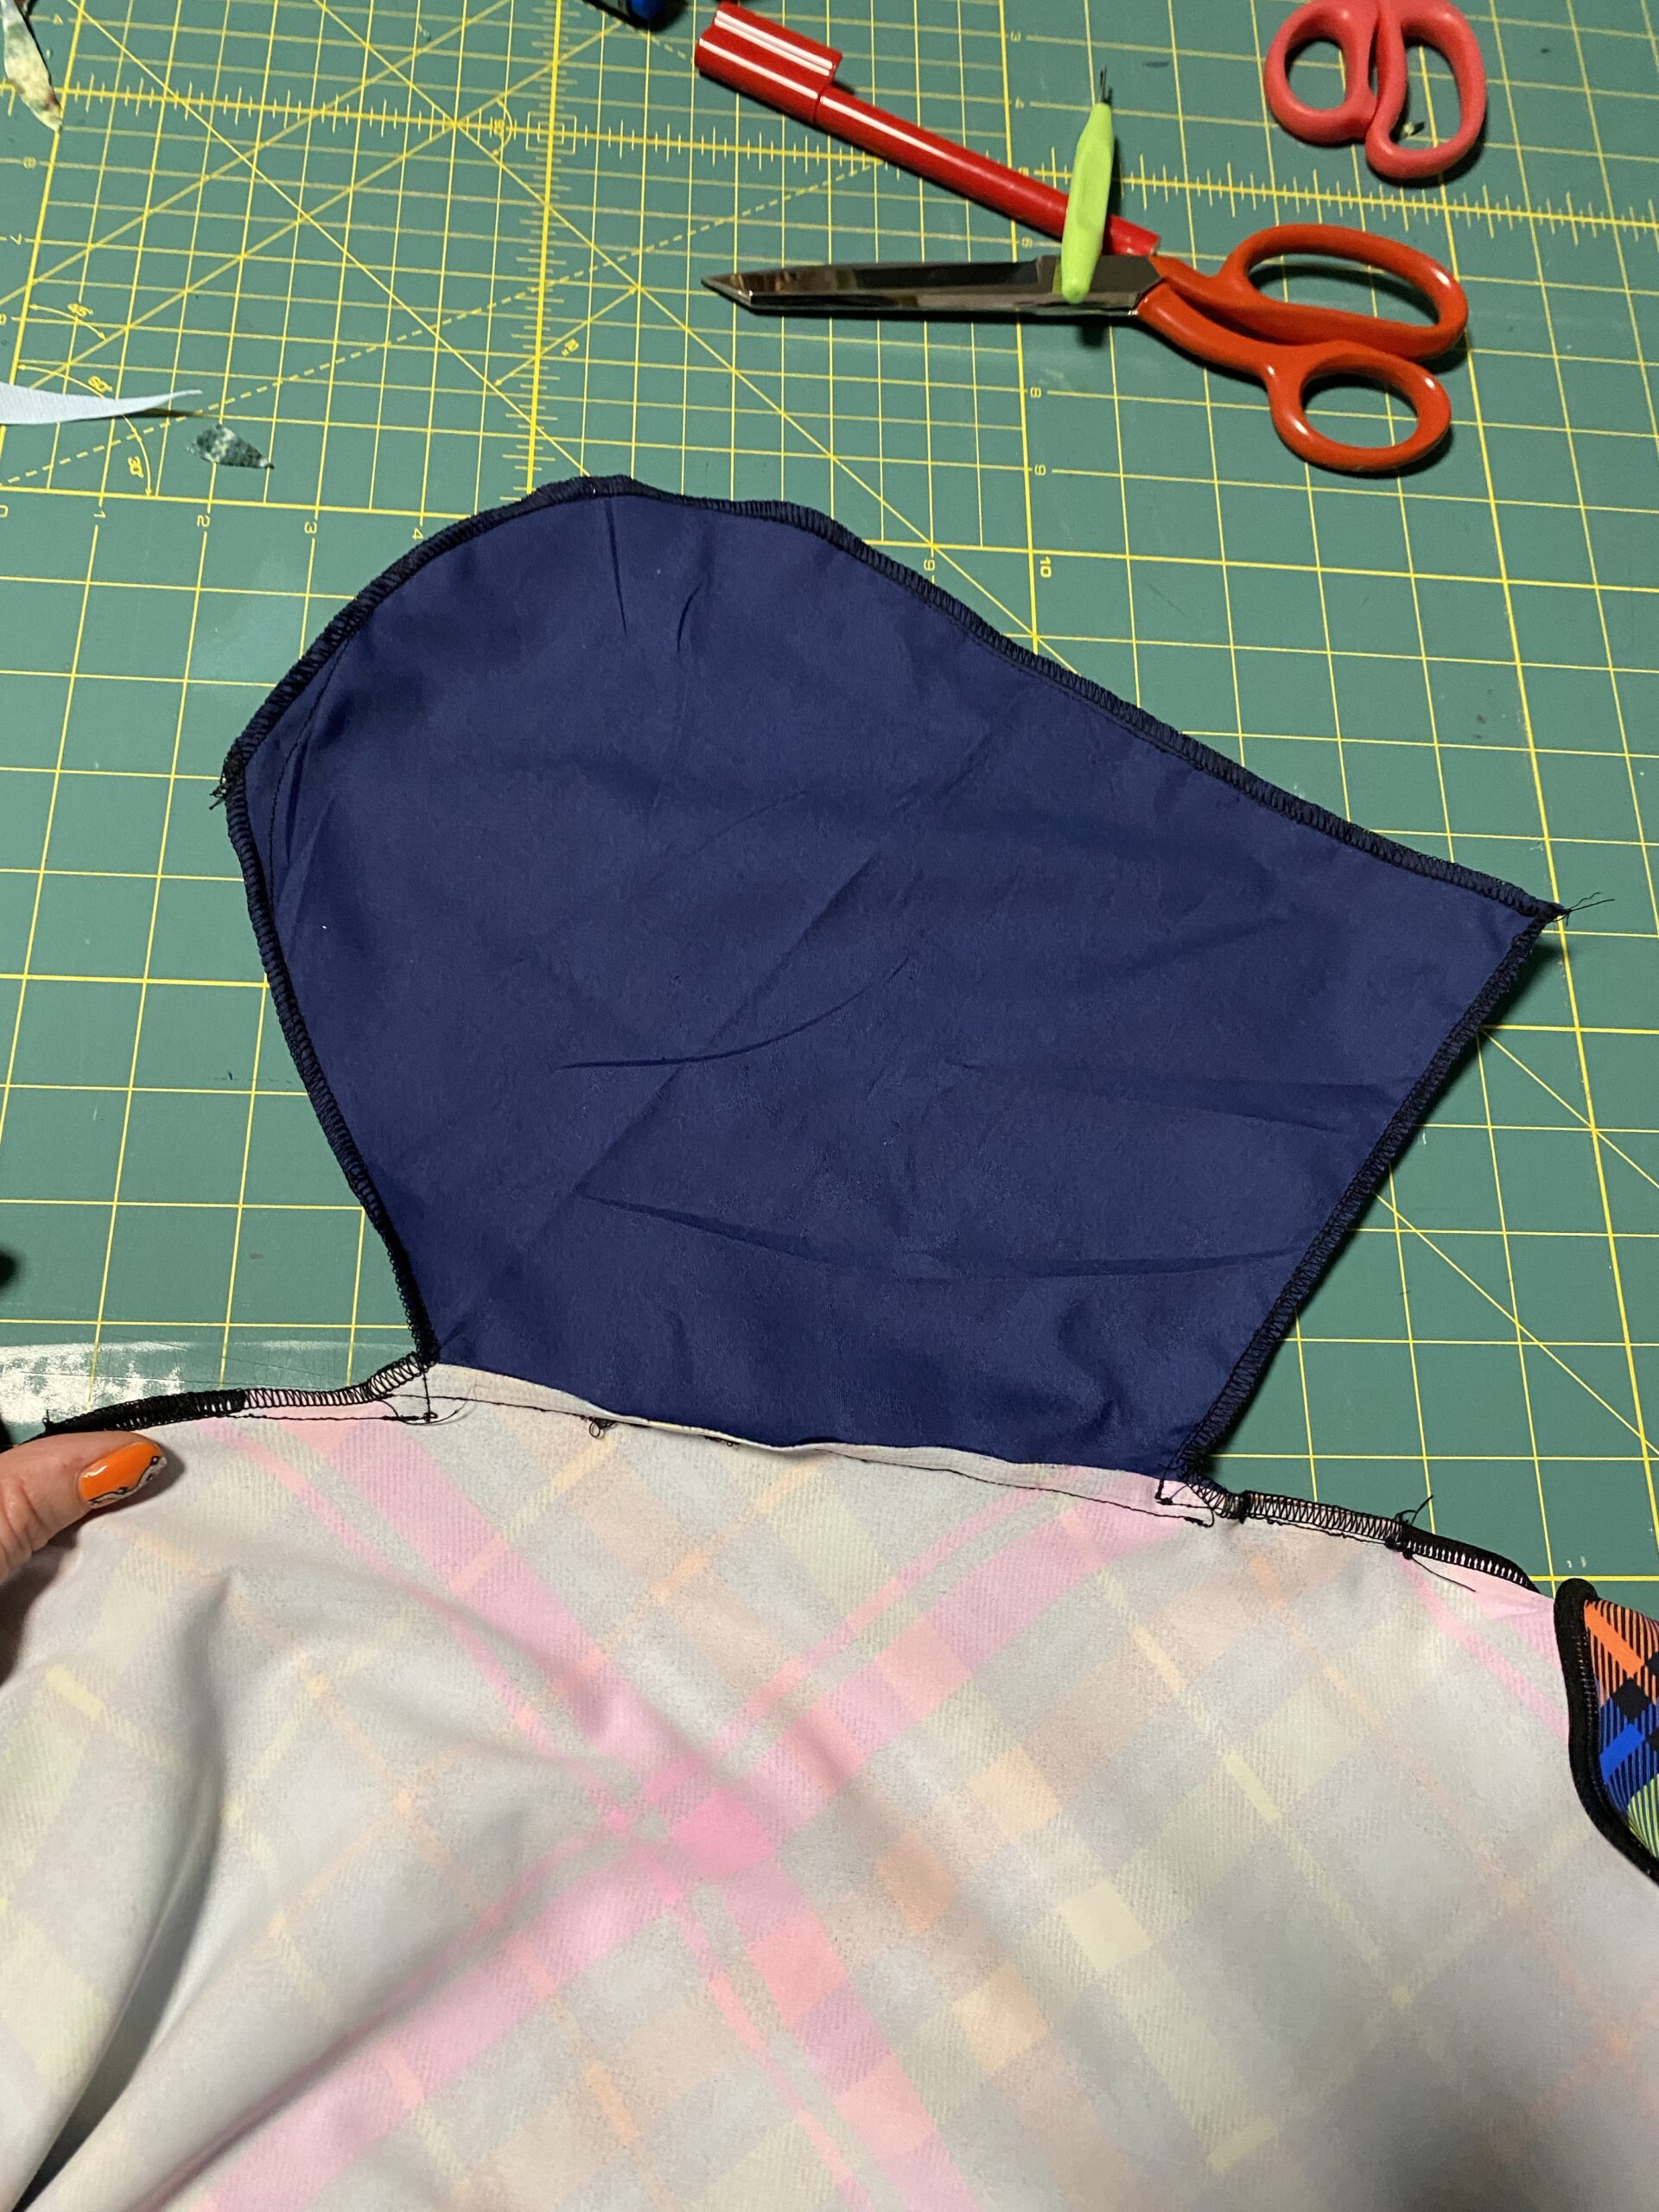
Step 6: Sew it up
Turn your garment inside out and line up the two pocket pieces, as well as your side seams. It’s time to complete the magical final stitch!
This is obviously heaps easier with a sewing machine – and if you are pretty new to sewing with a machine here’s a tip!
When you reach that sharp corner where the seam meets the pocket, stitch right up to where you need to turn. Drop your needle down into the fabric, then lift your presser foot up. Rotate the fabric using the needle as your axis, and then drop the presser foot again. Keep sewing. Voilá!
Step 7: Tell the World!
Thanks, it has pockets!
– You
Also help fight the good fight and make sure you tag the brand on socials and let them know you fixed their oversight. #yourewelcome